Reservety
Bookings 67 steps

Filter and Export Orders

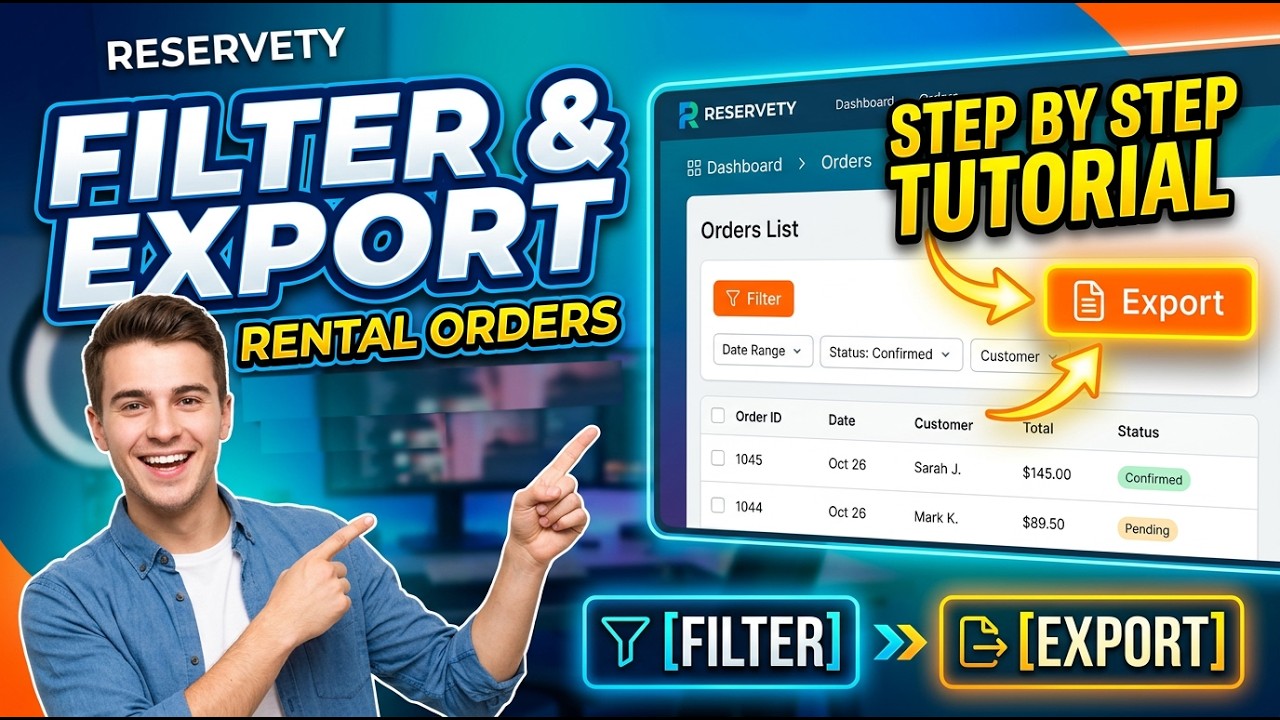
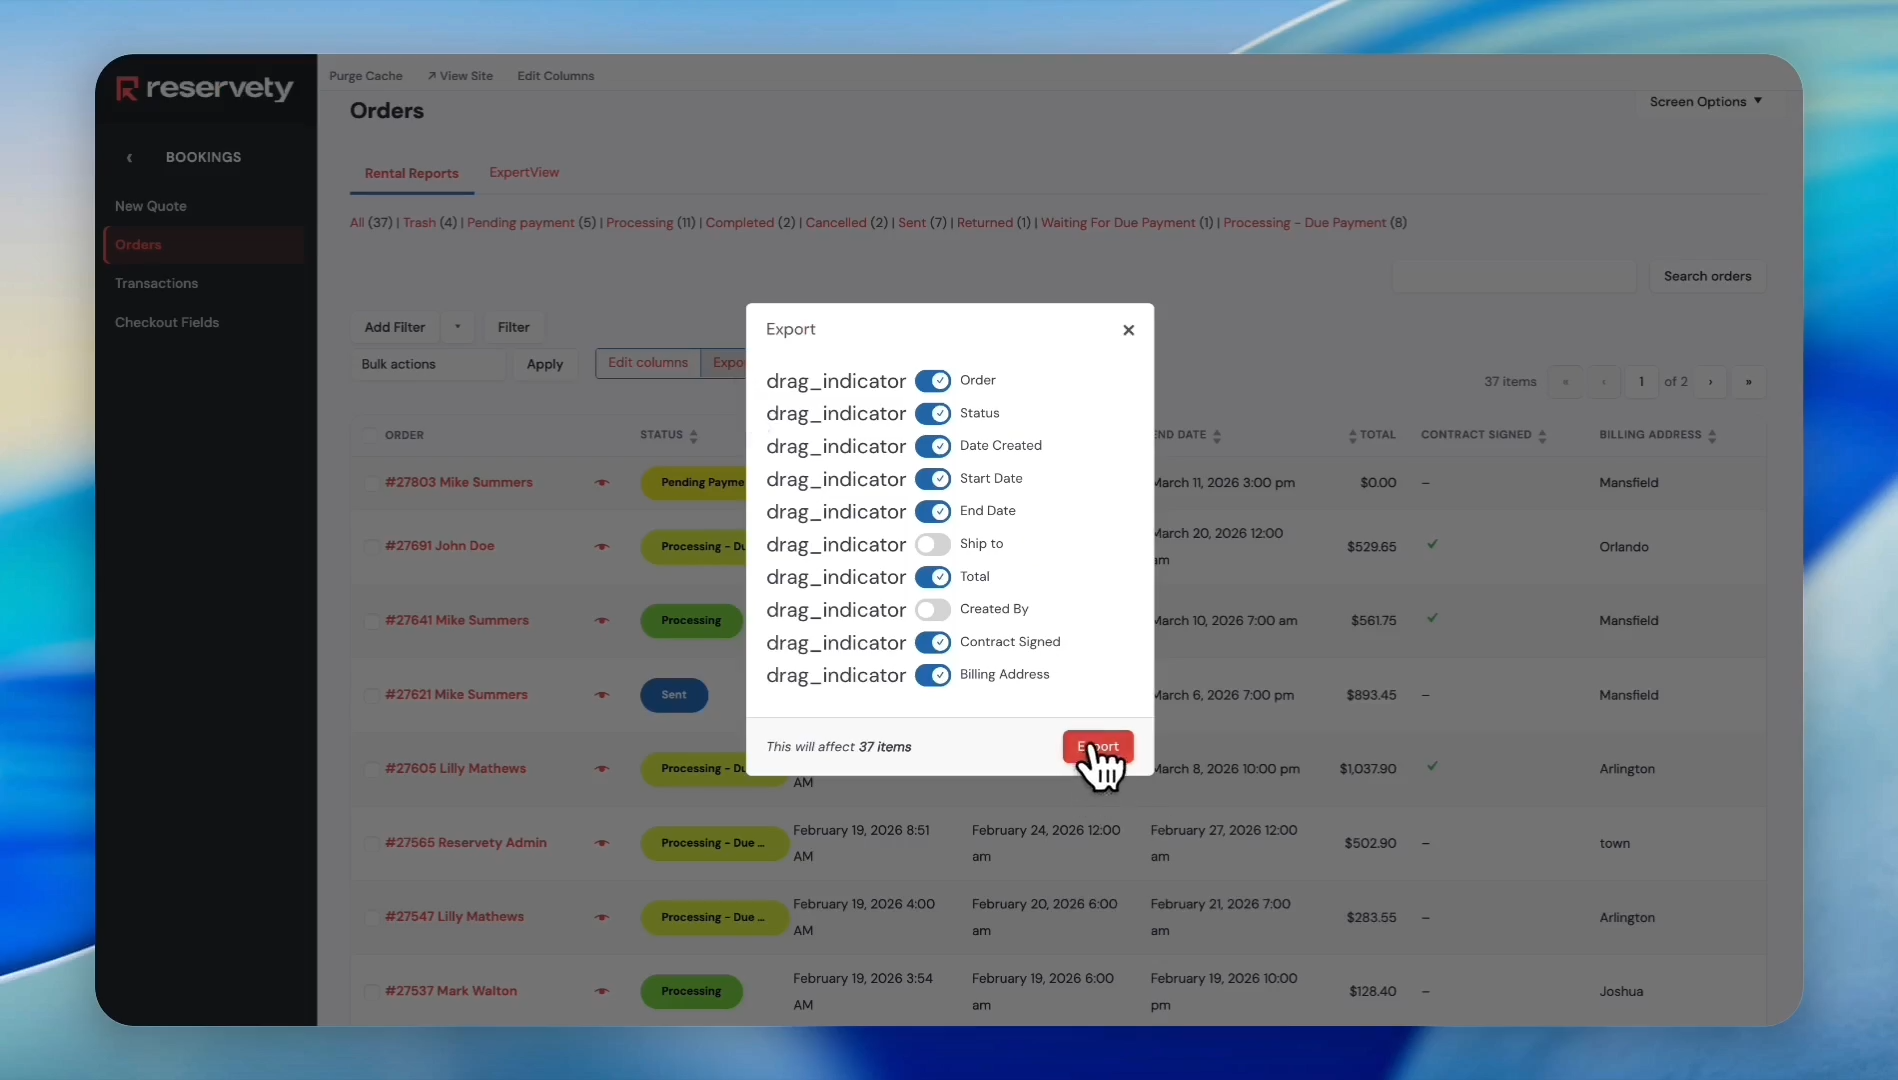
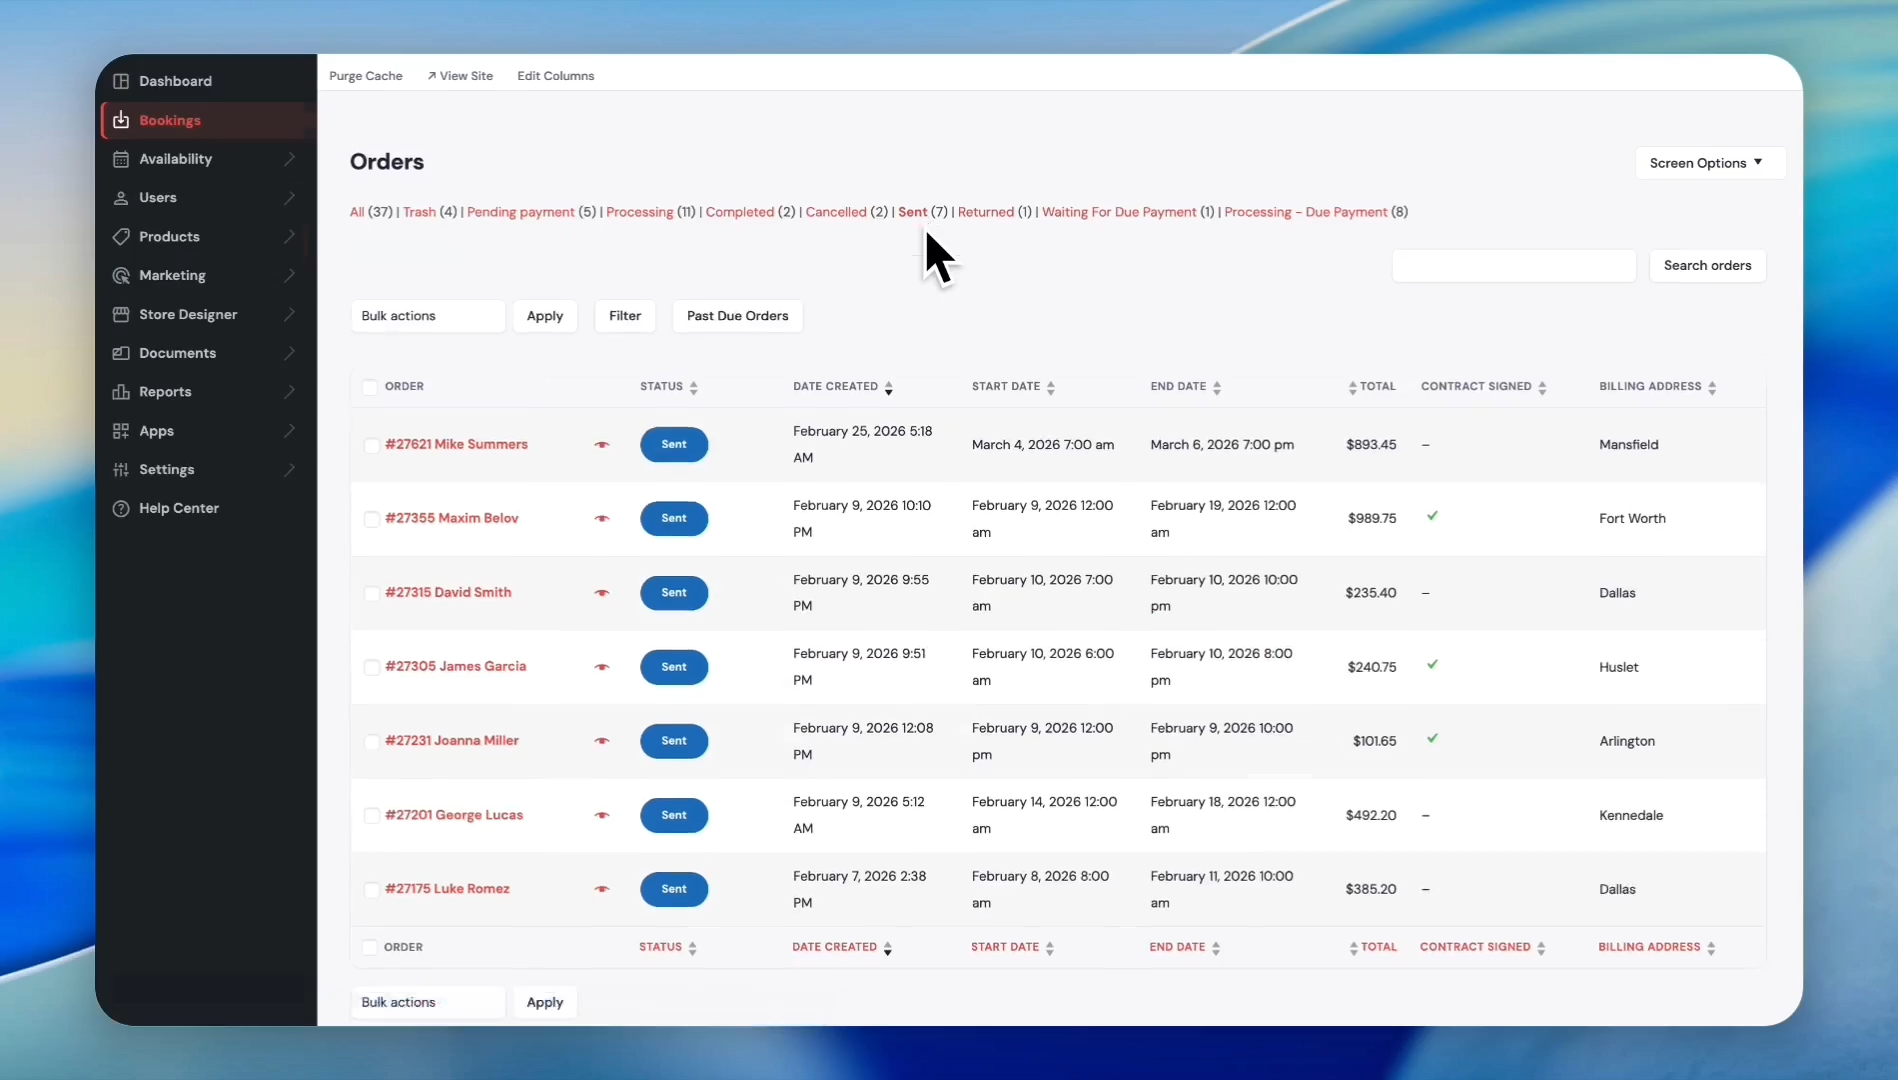
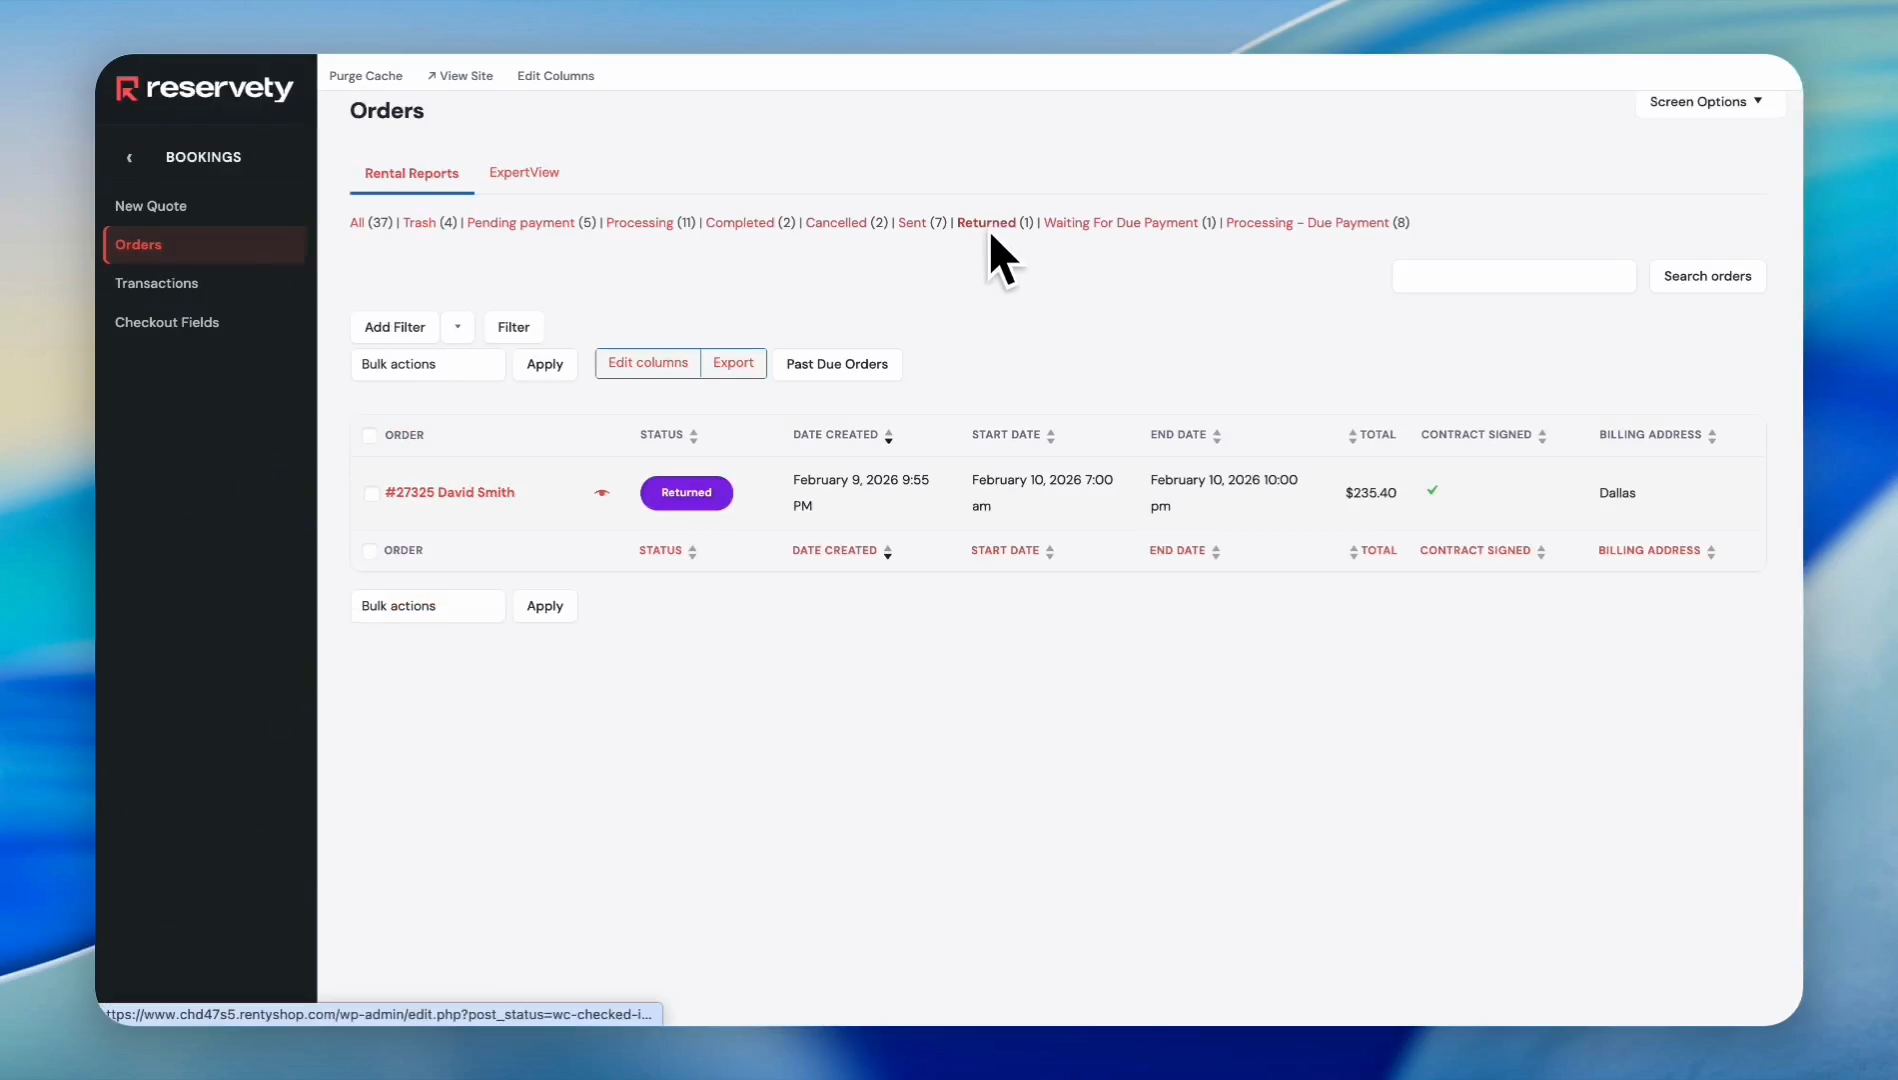
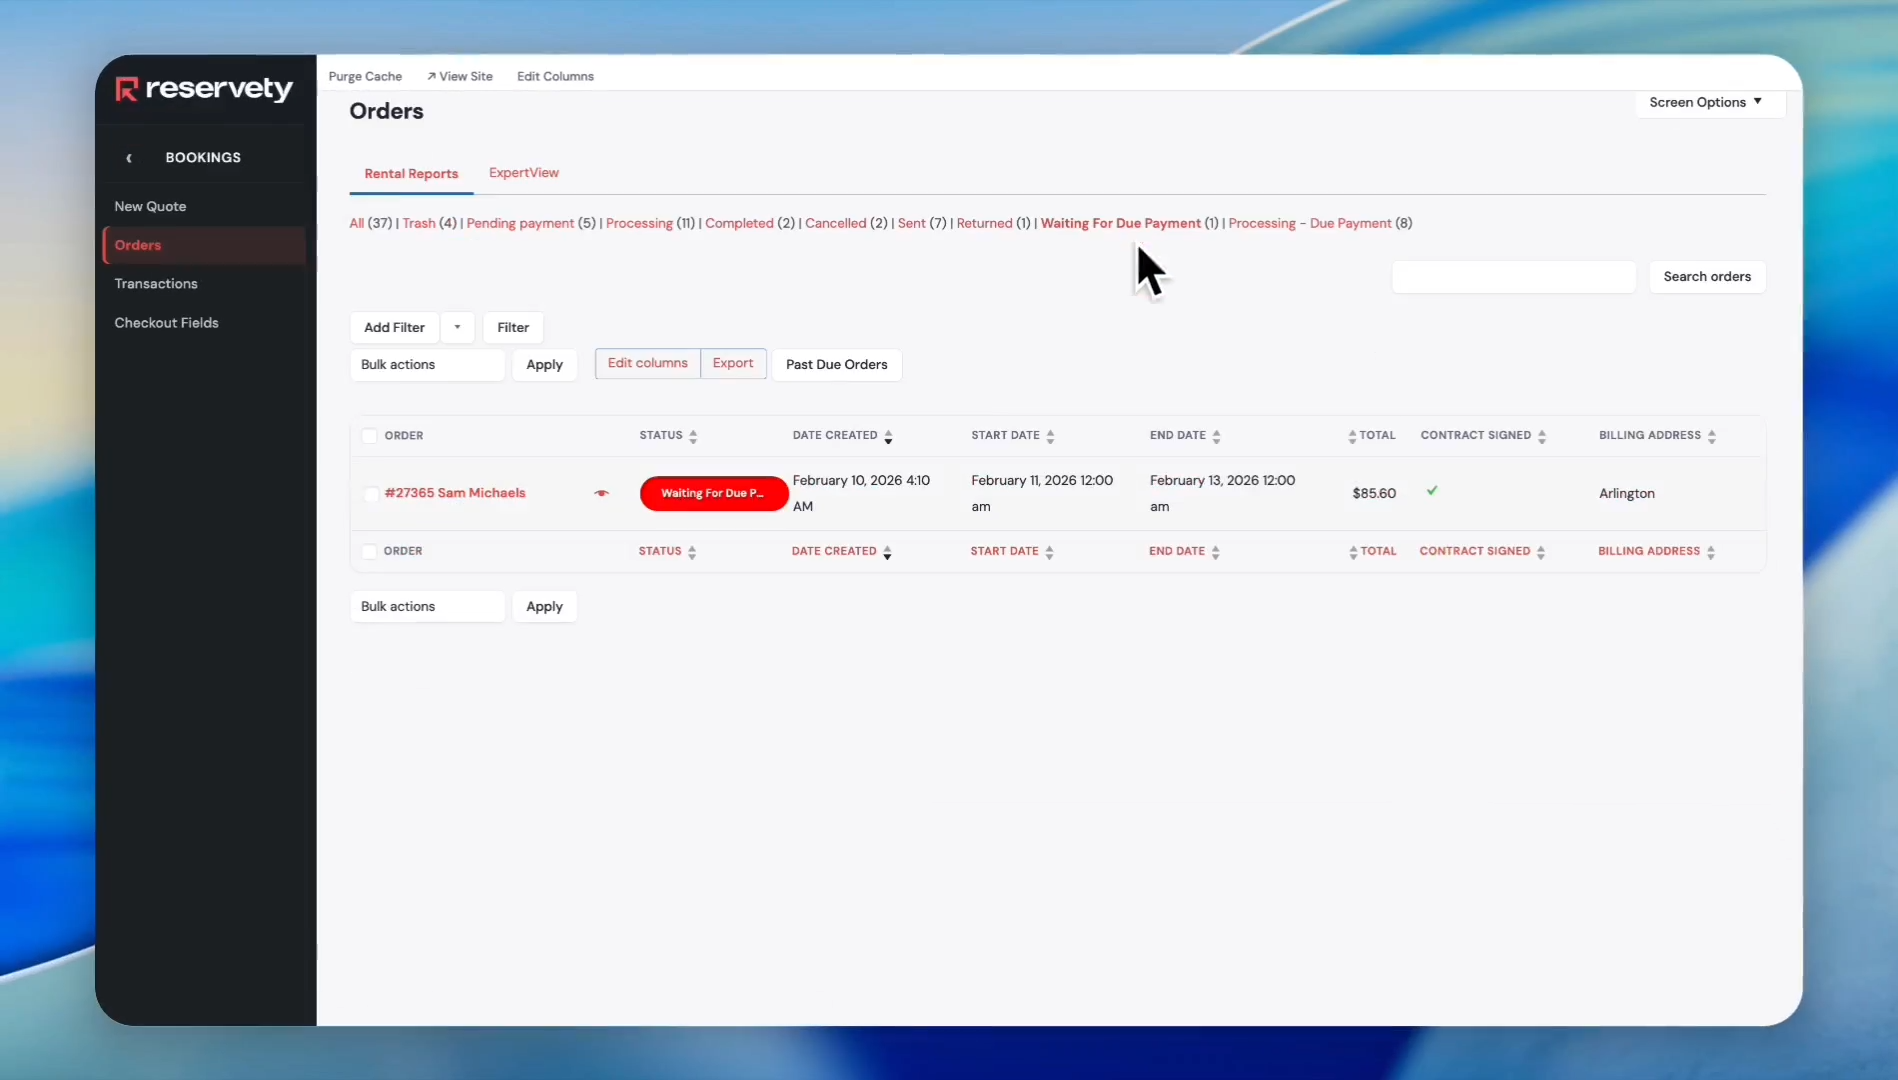
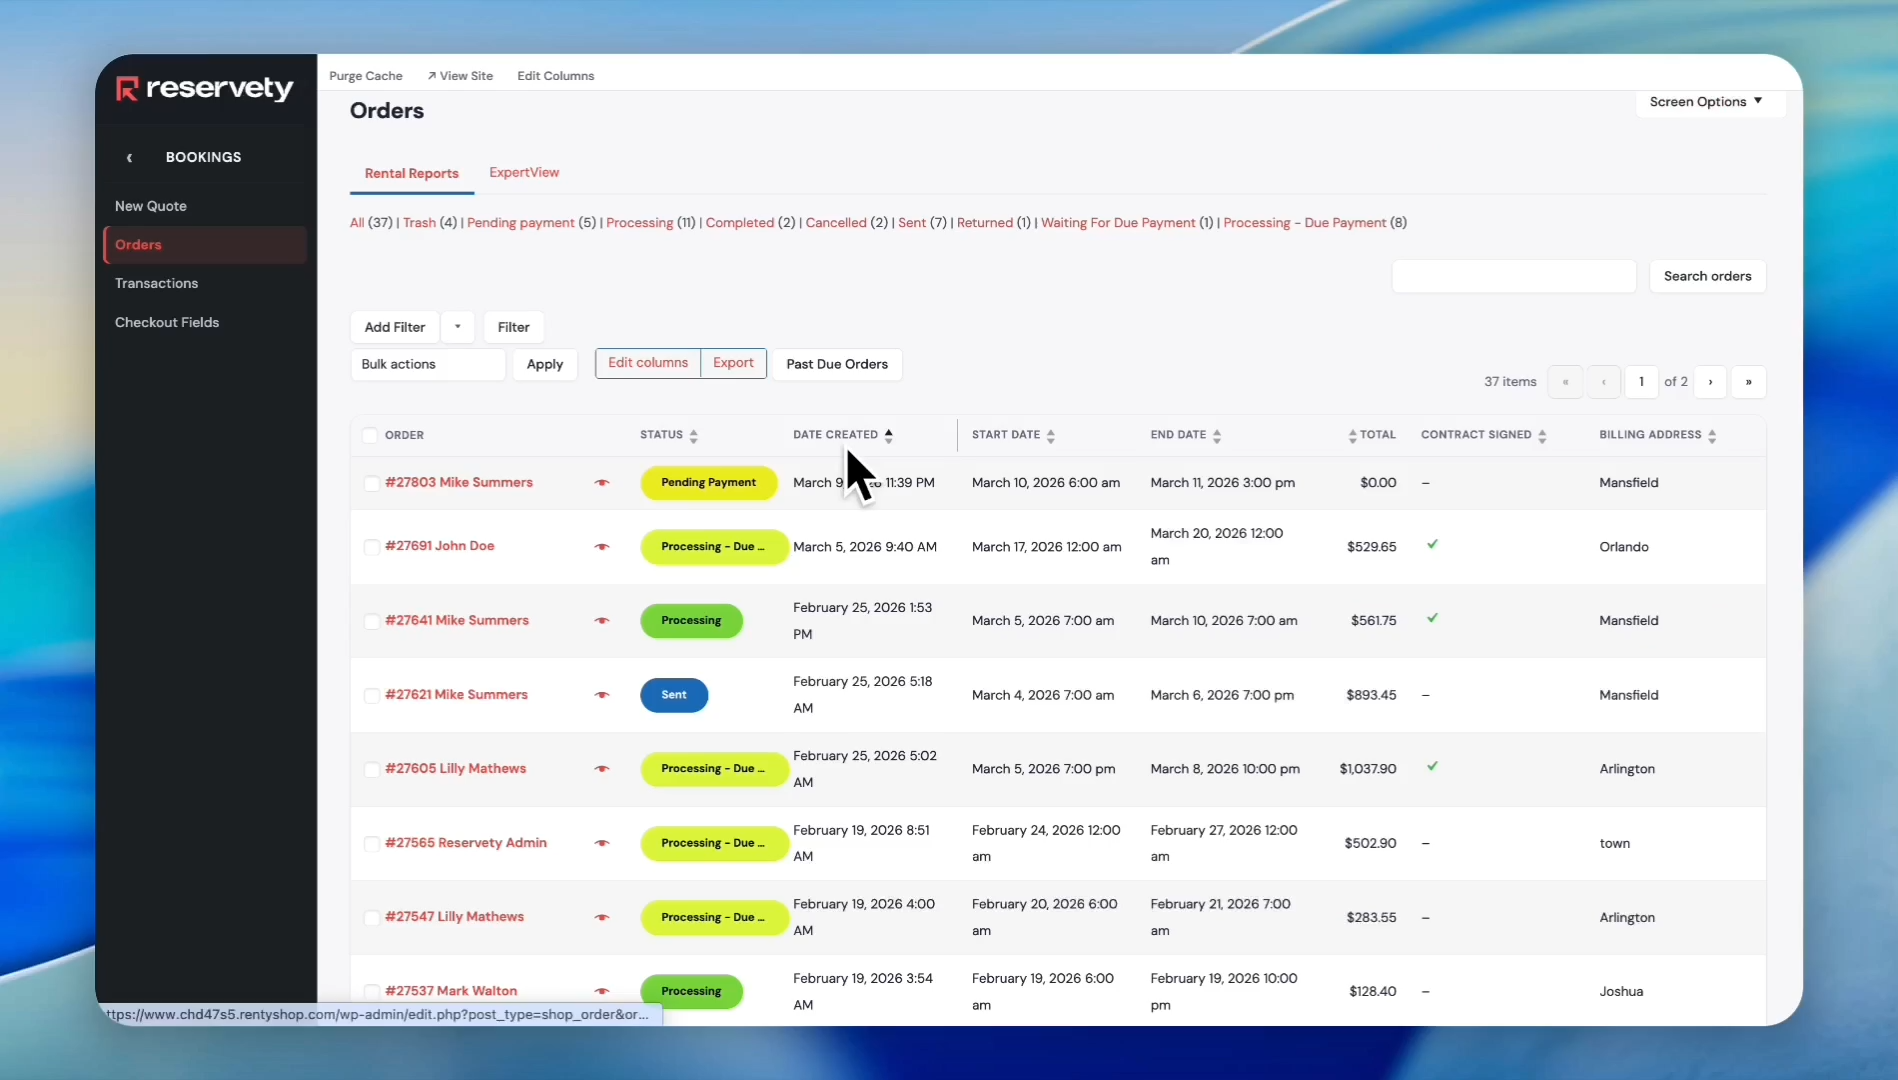
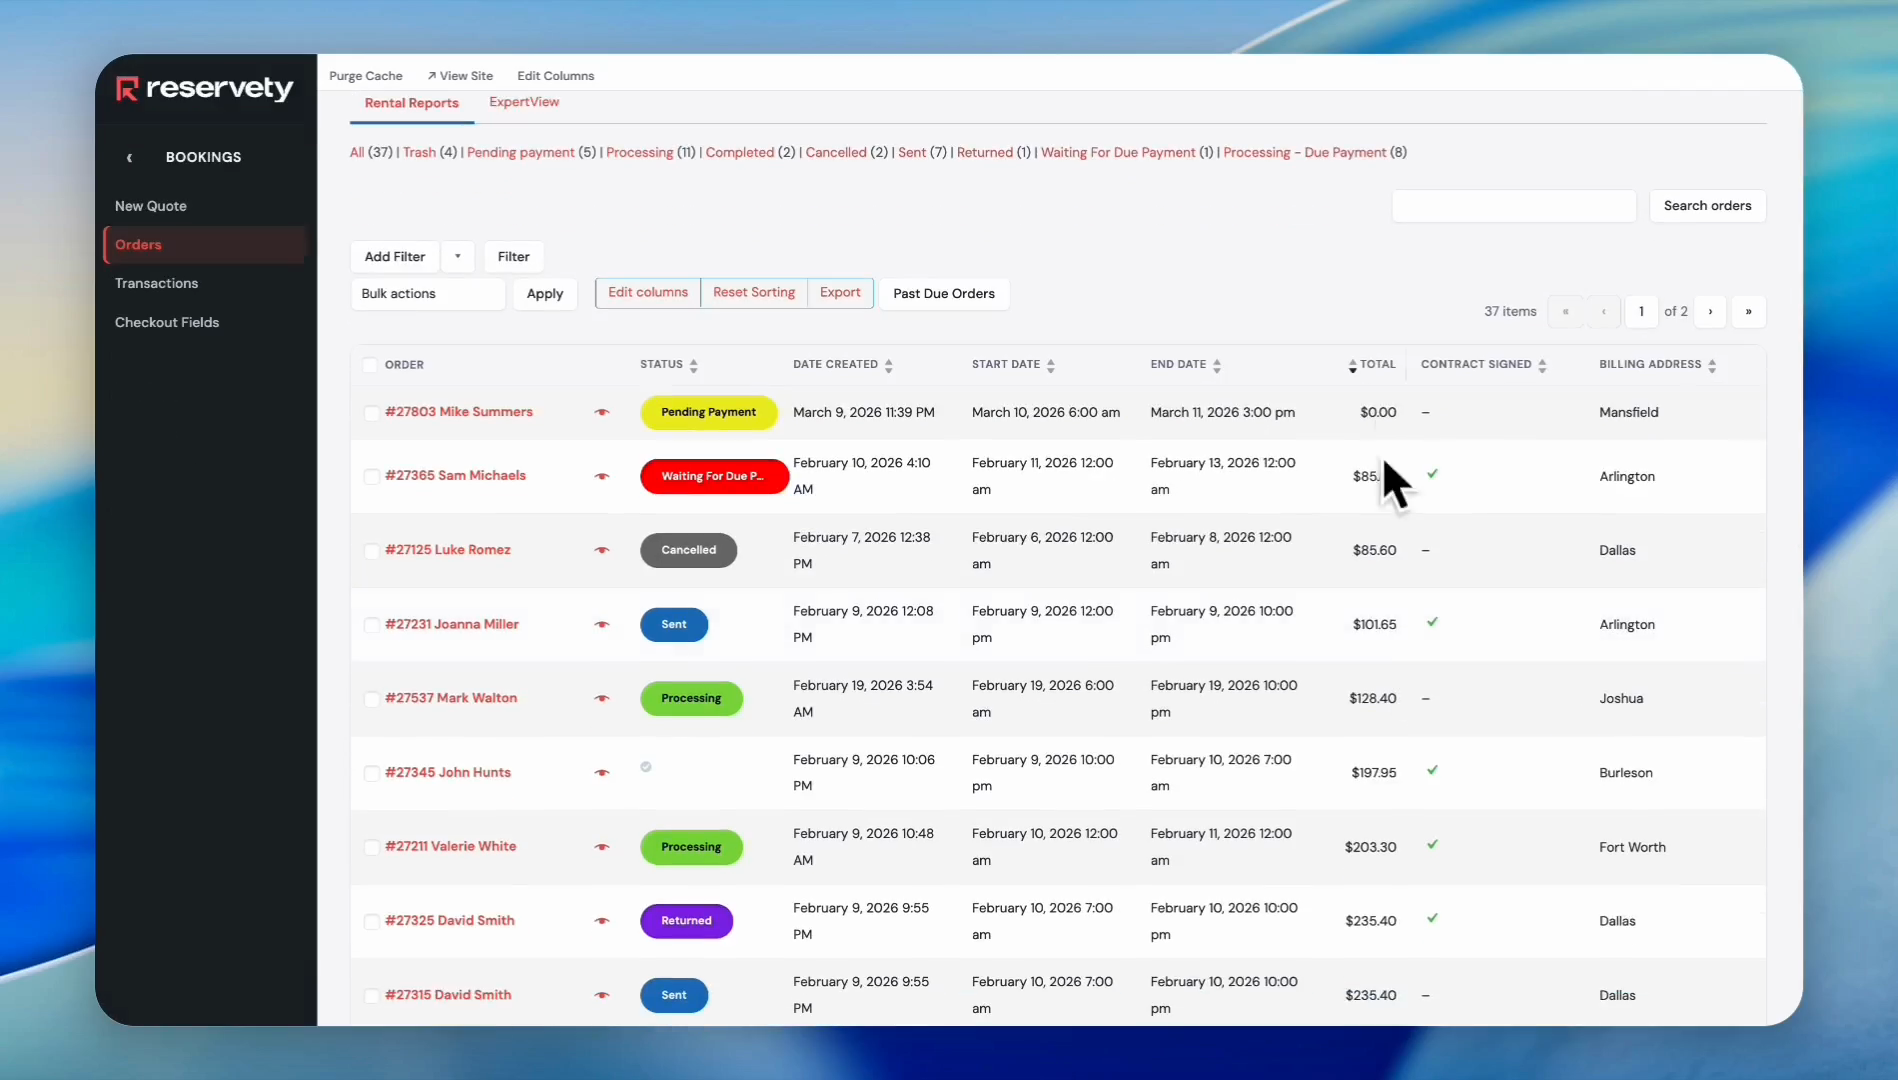
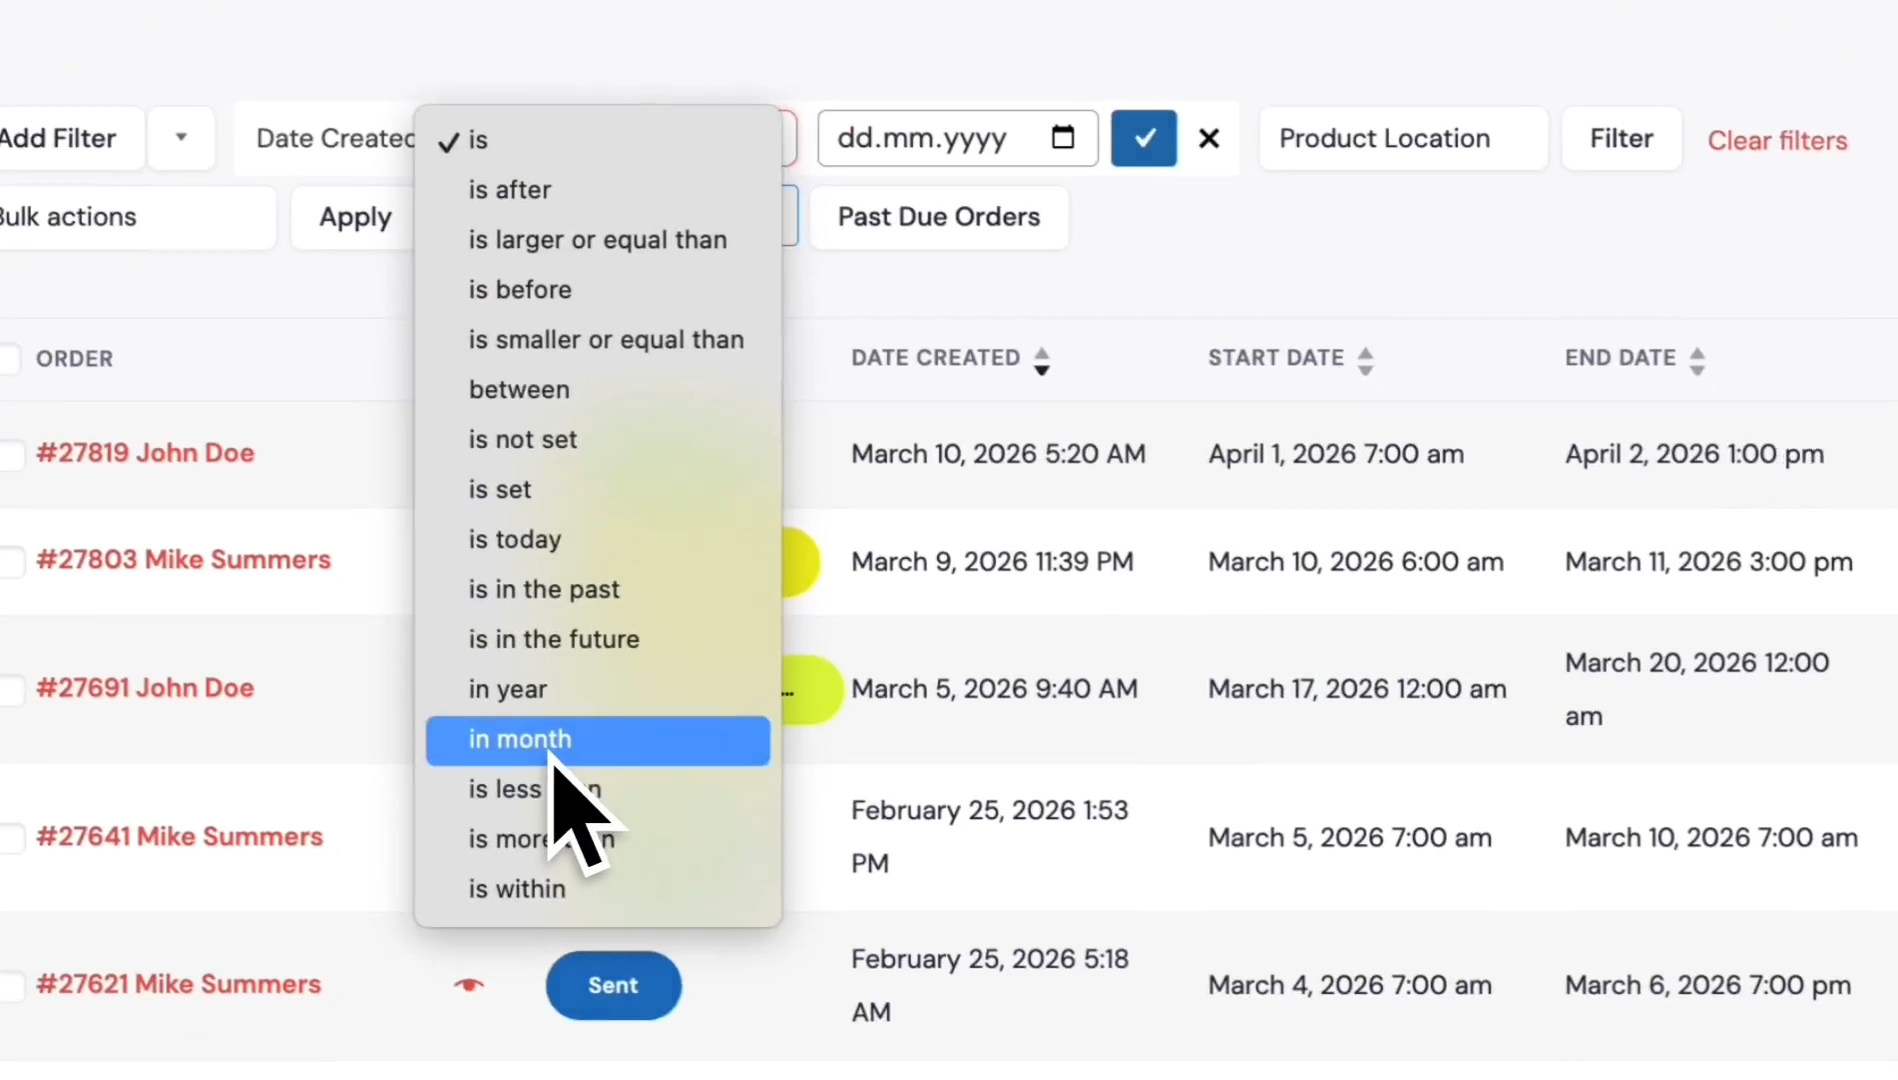
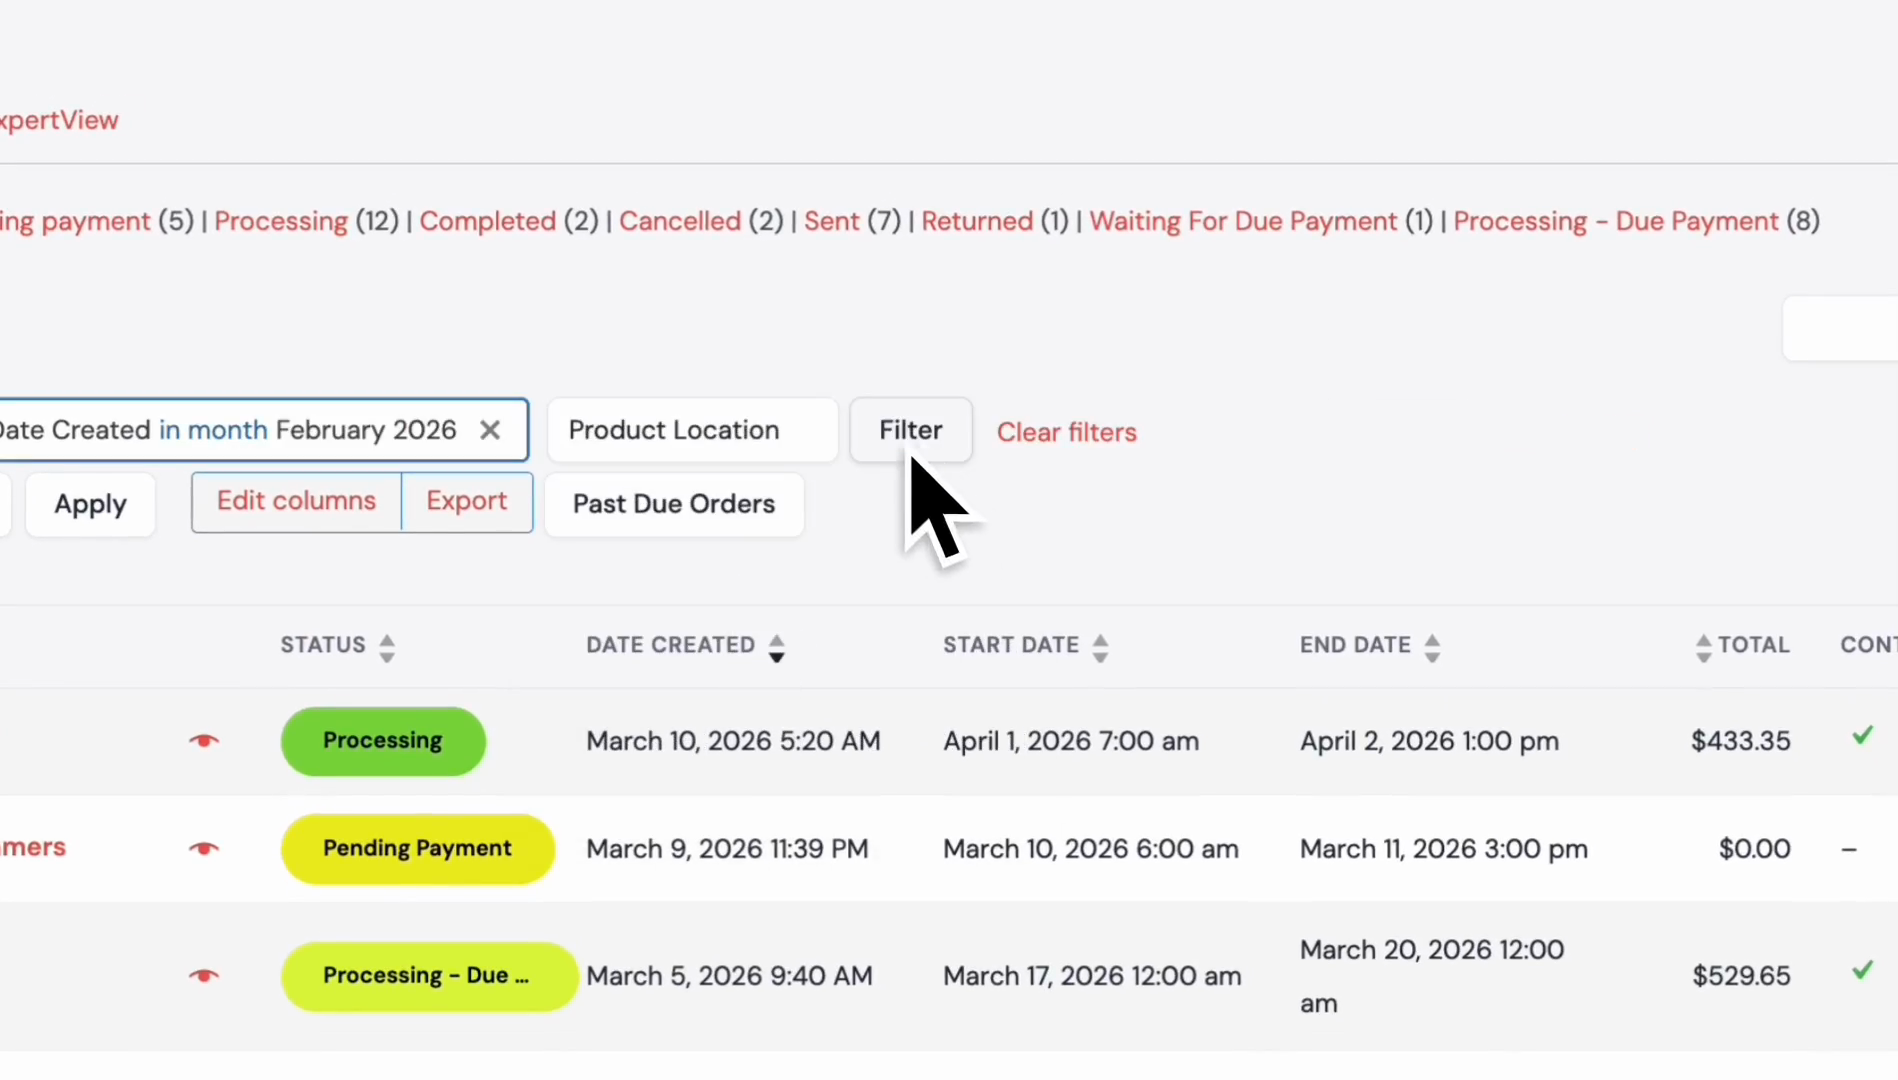
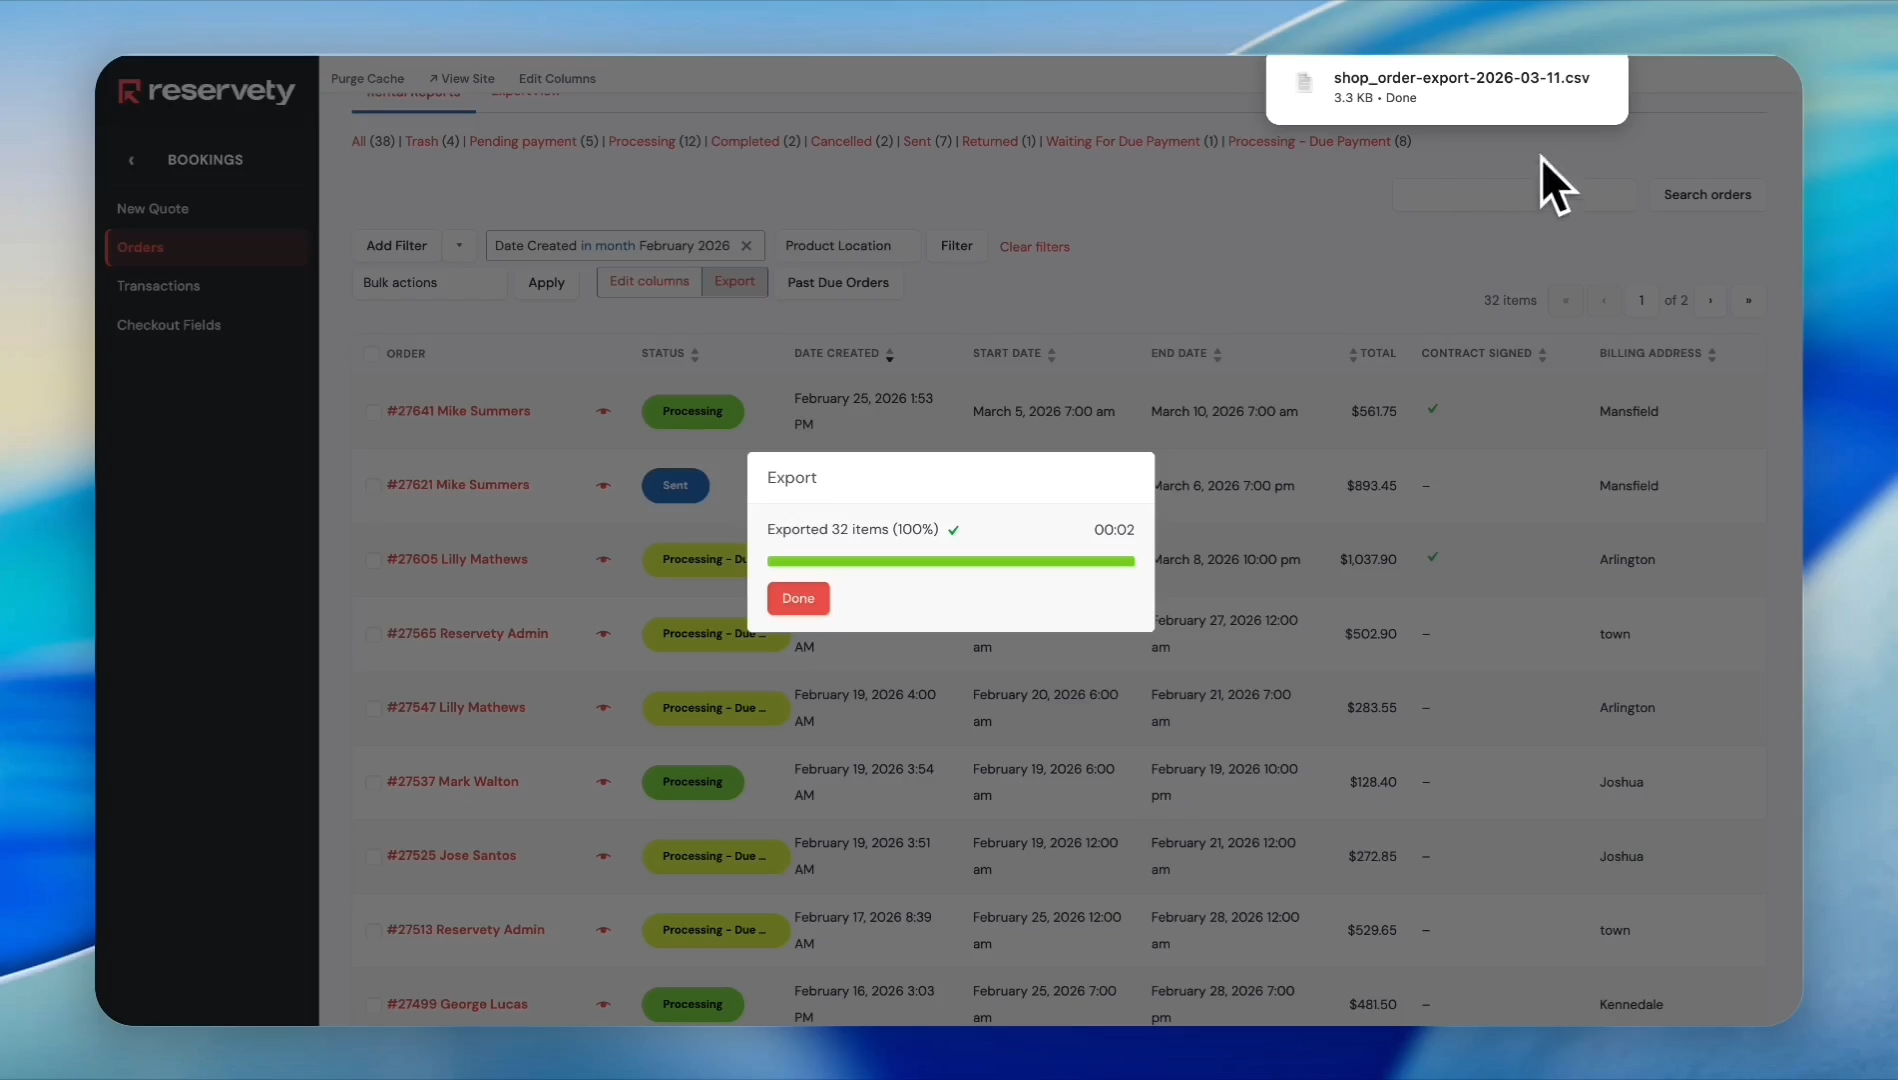
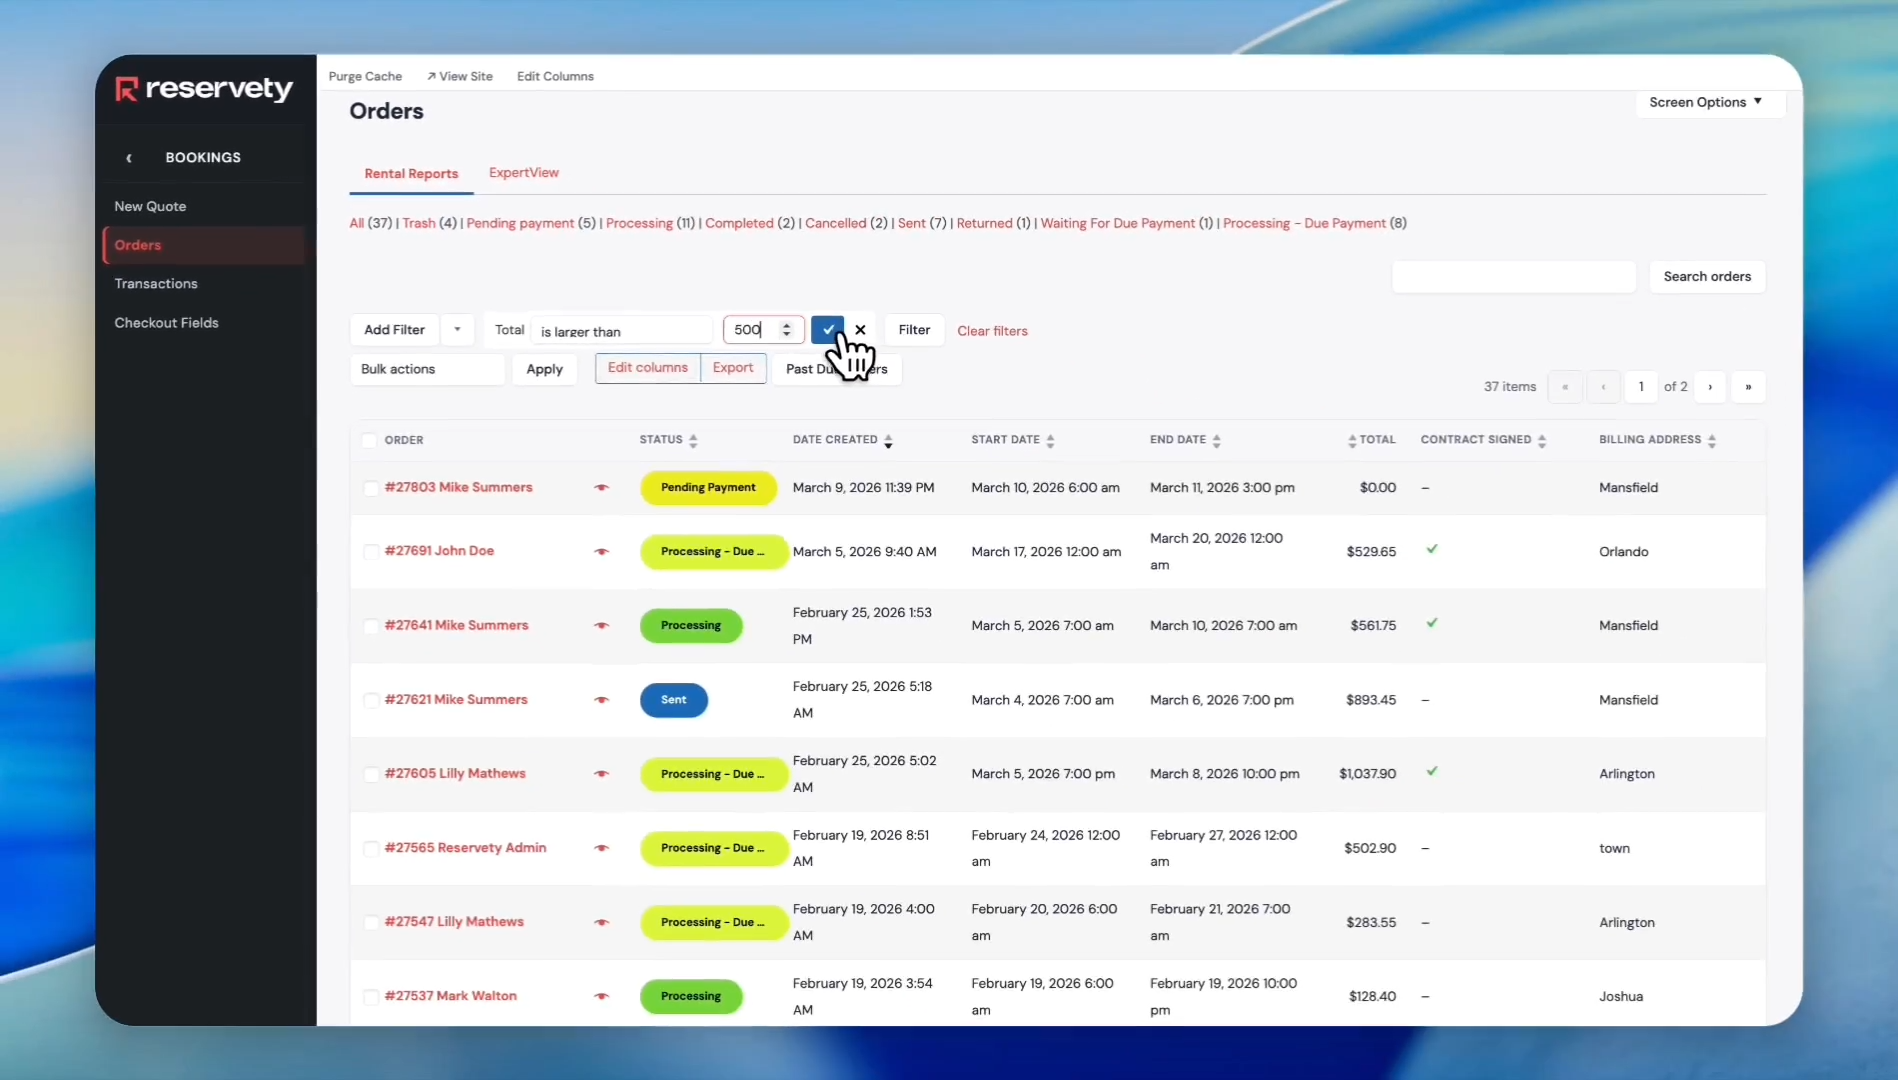
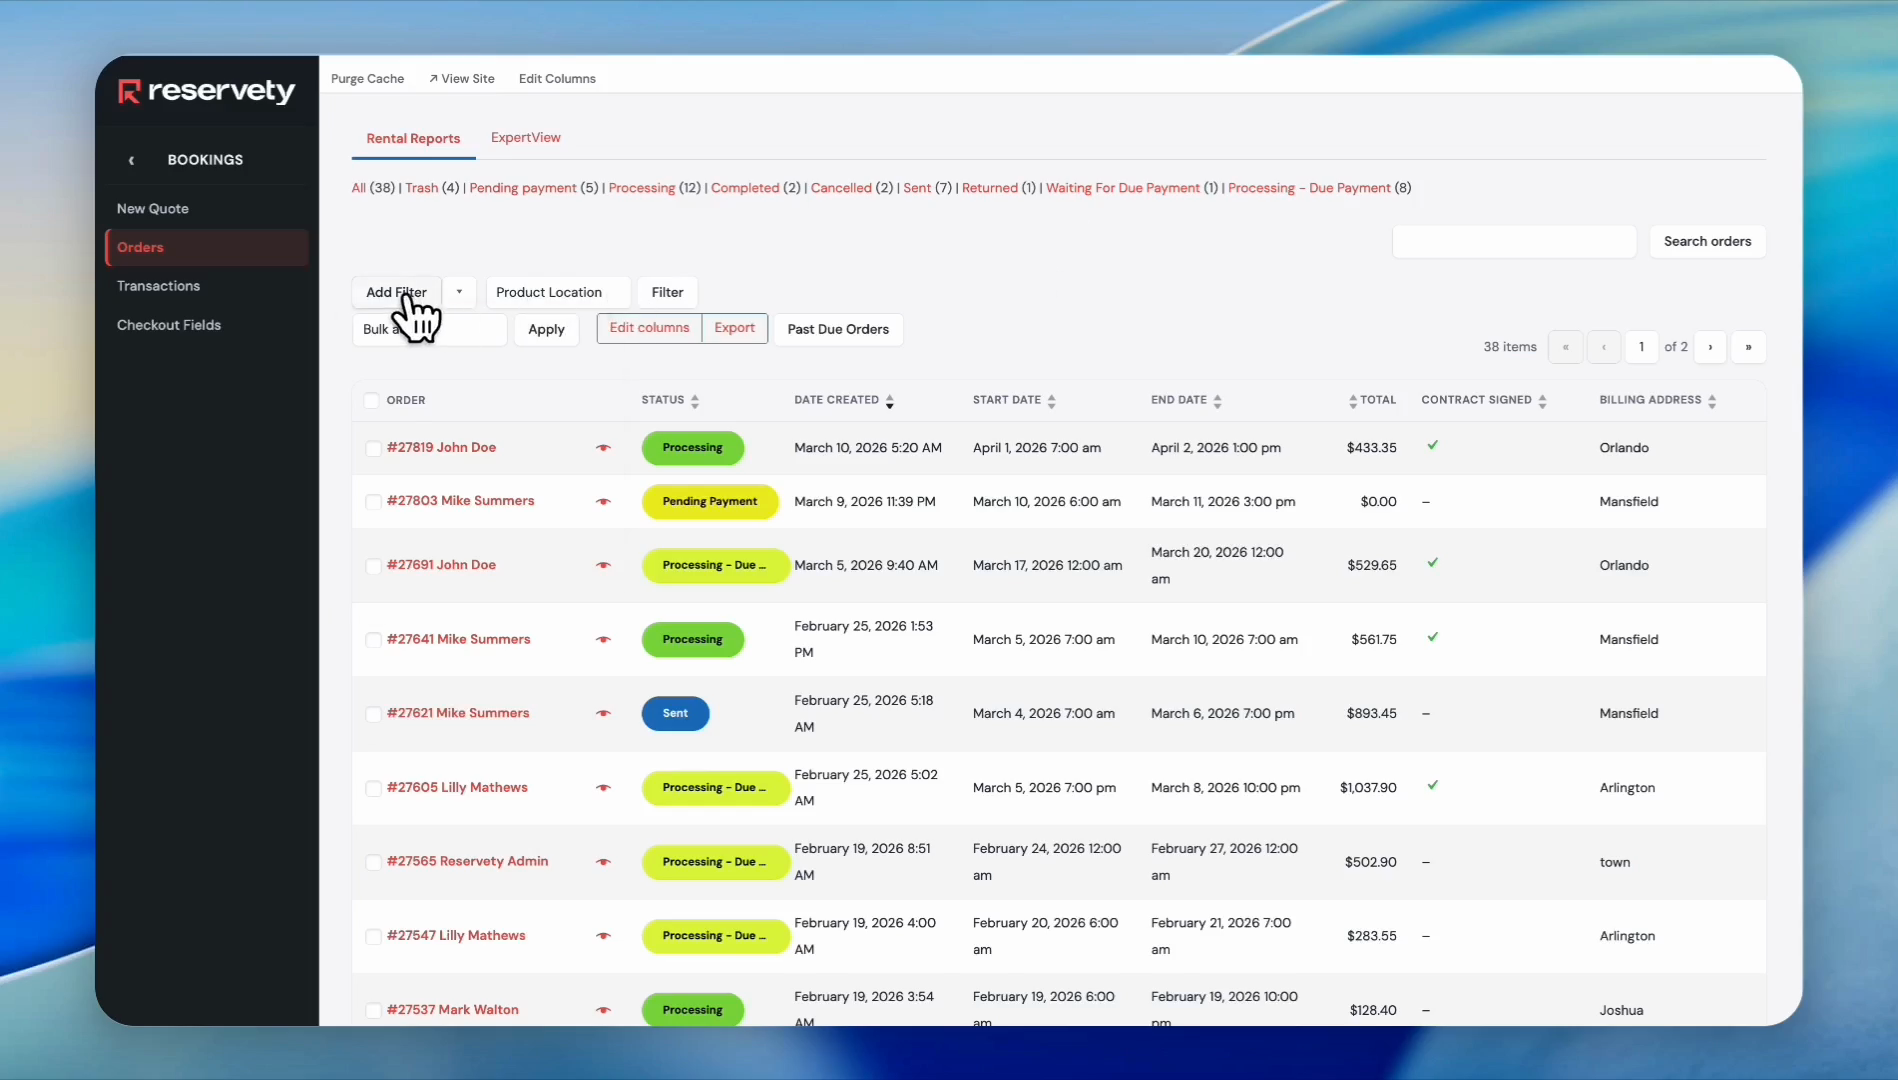
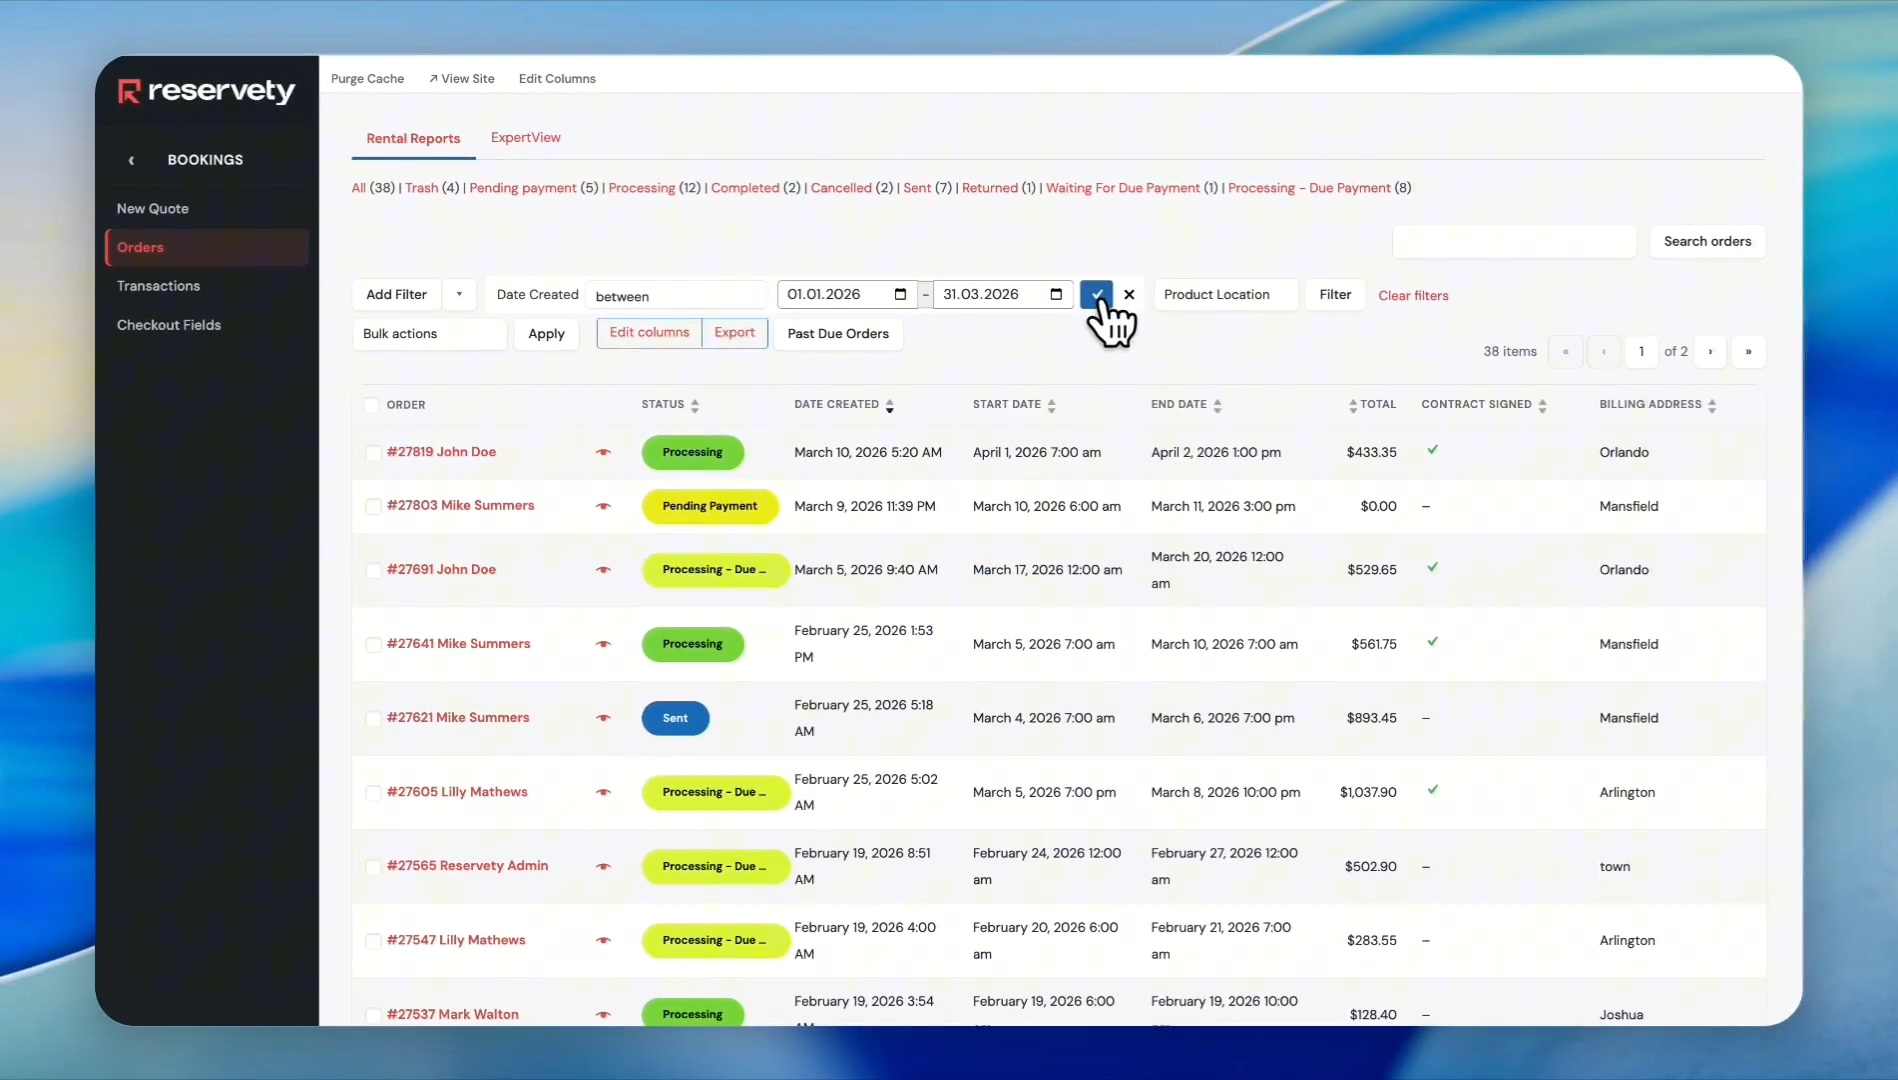
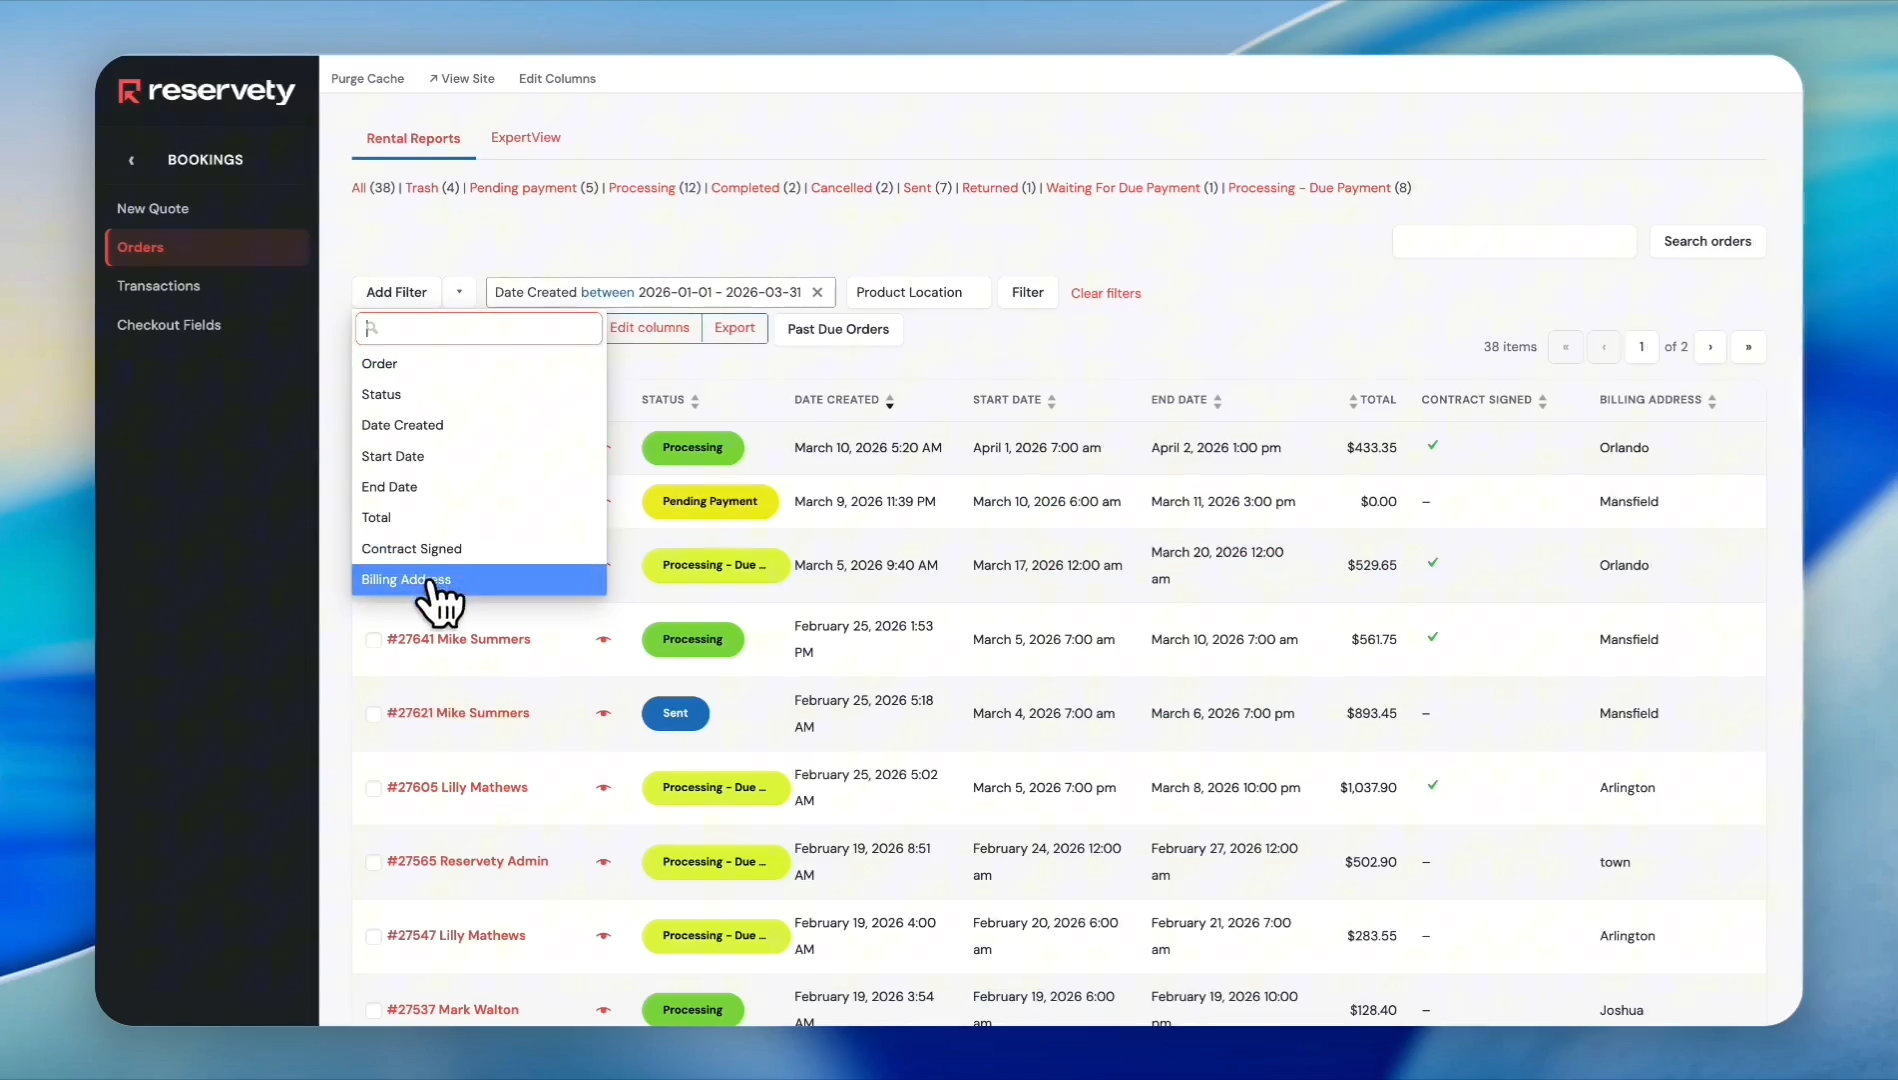
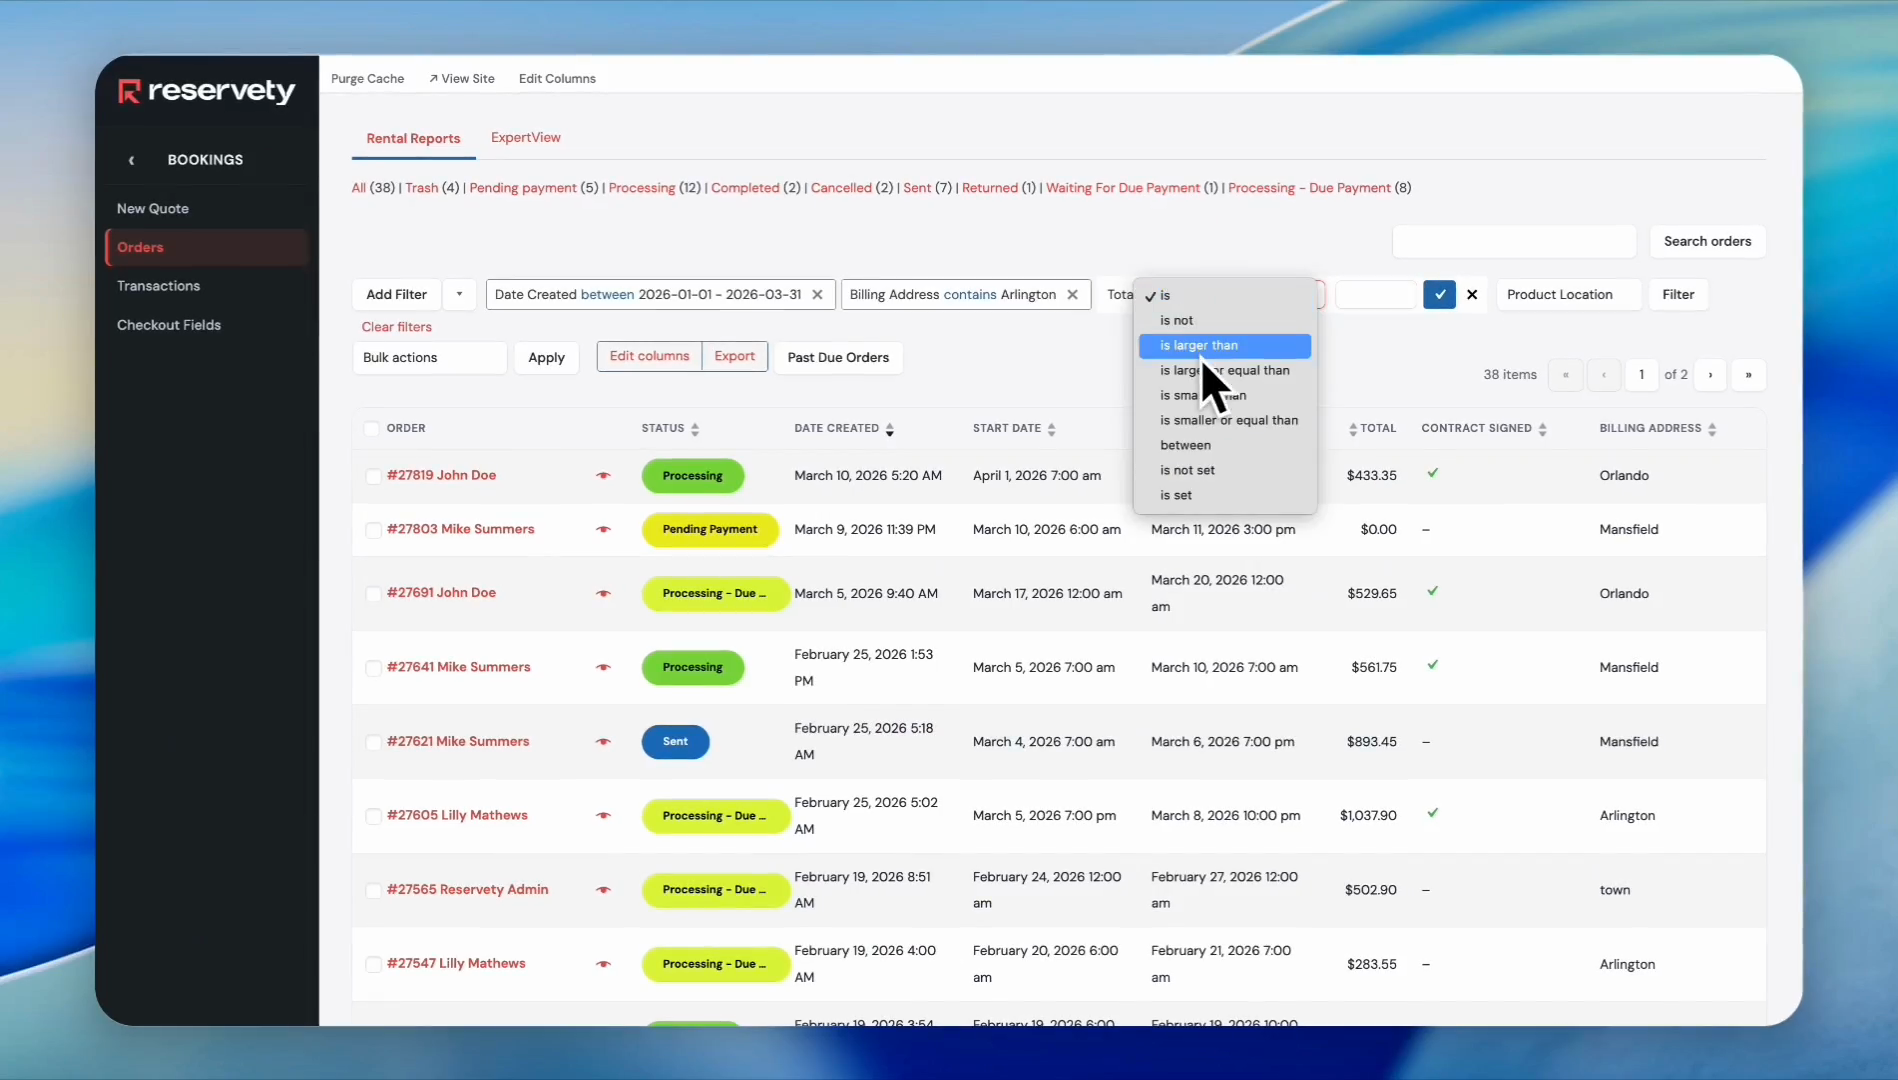
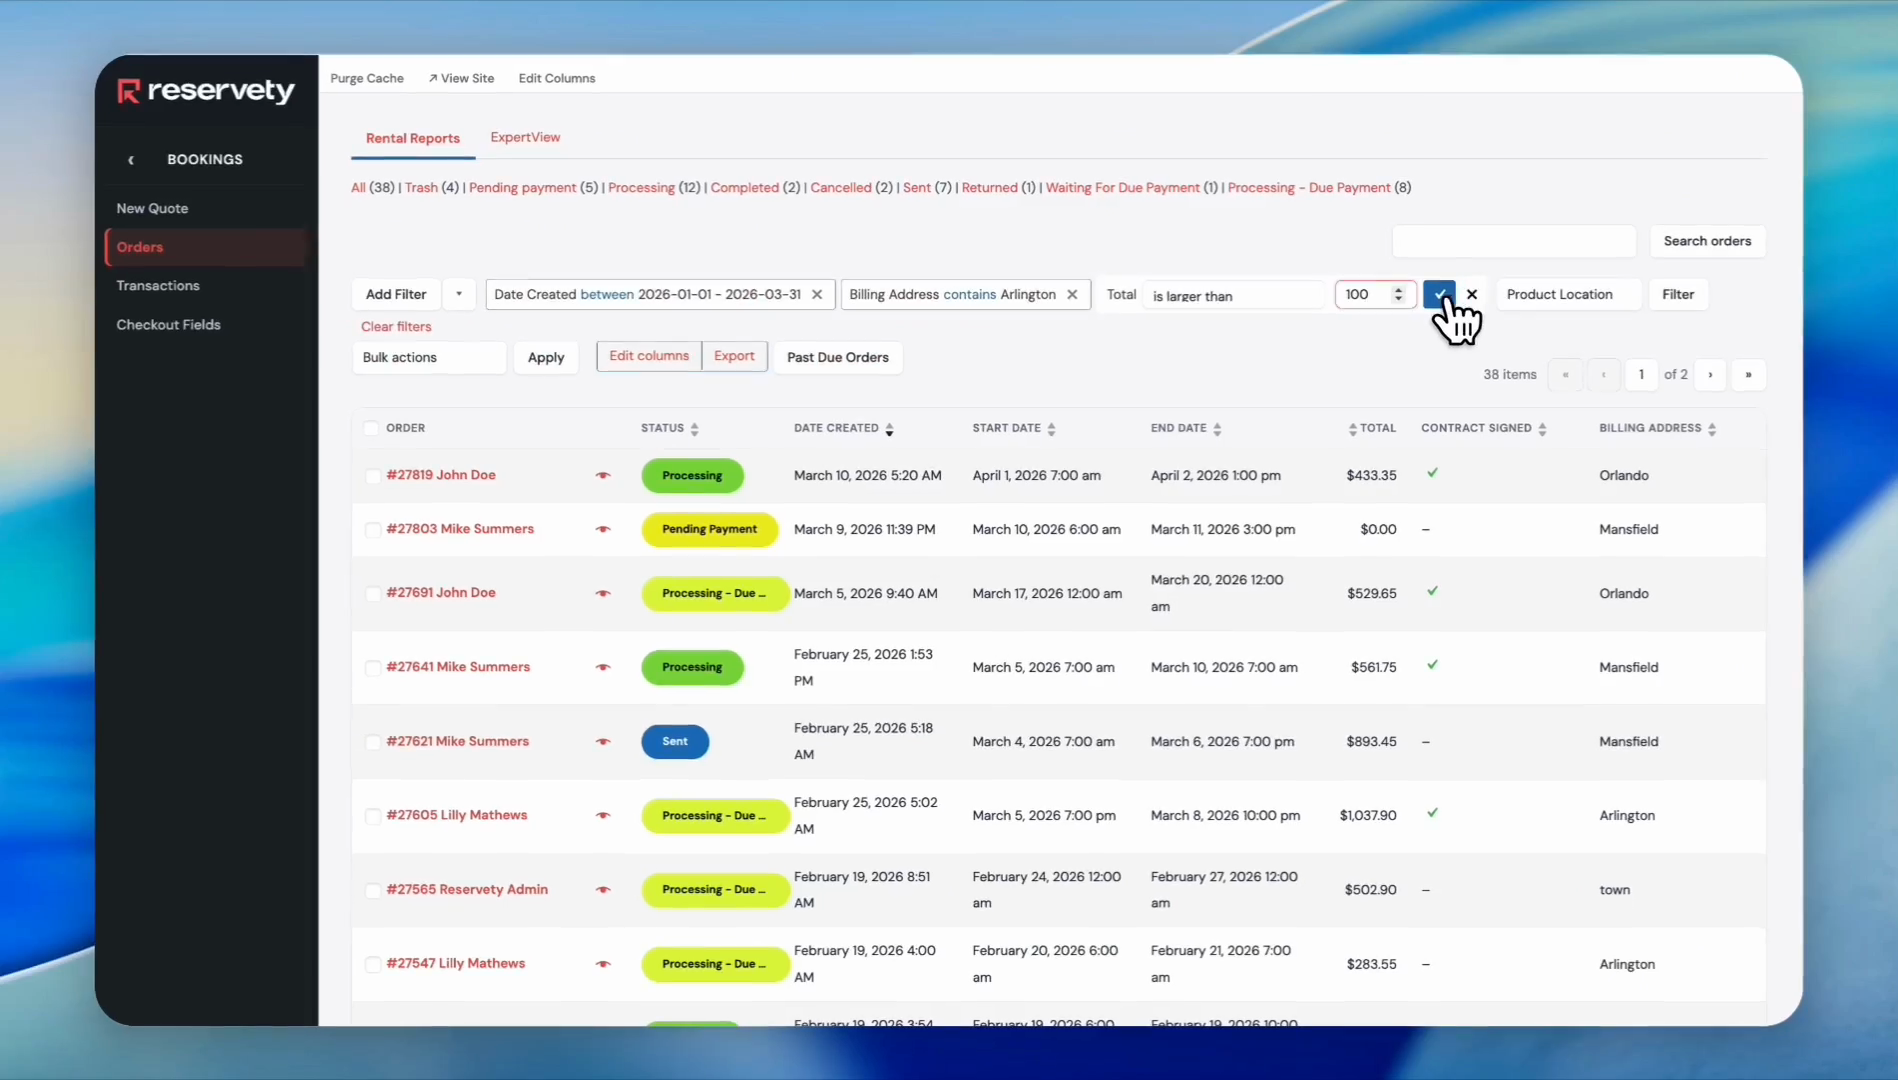
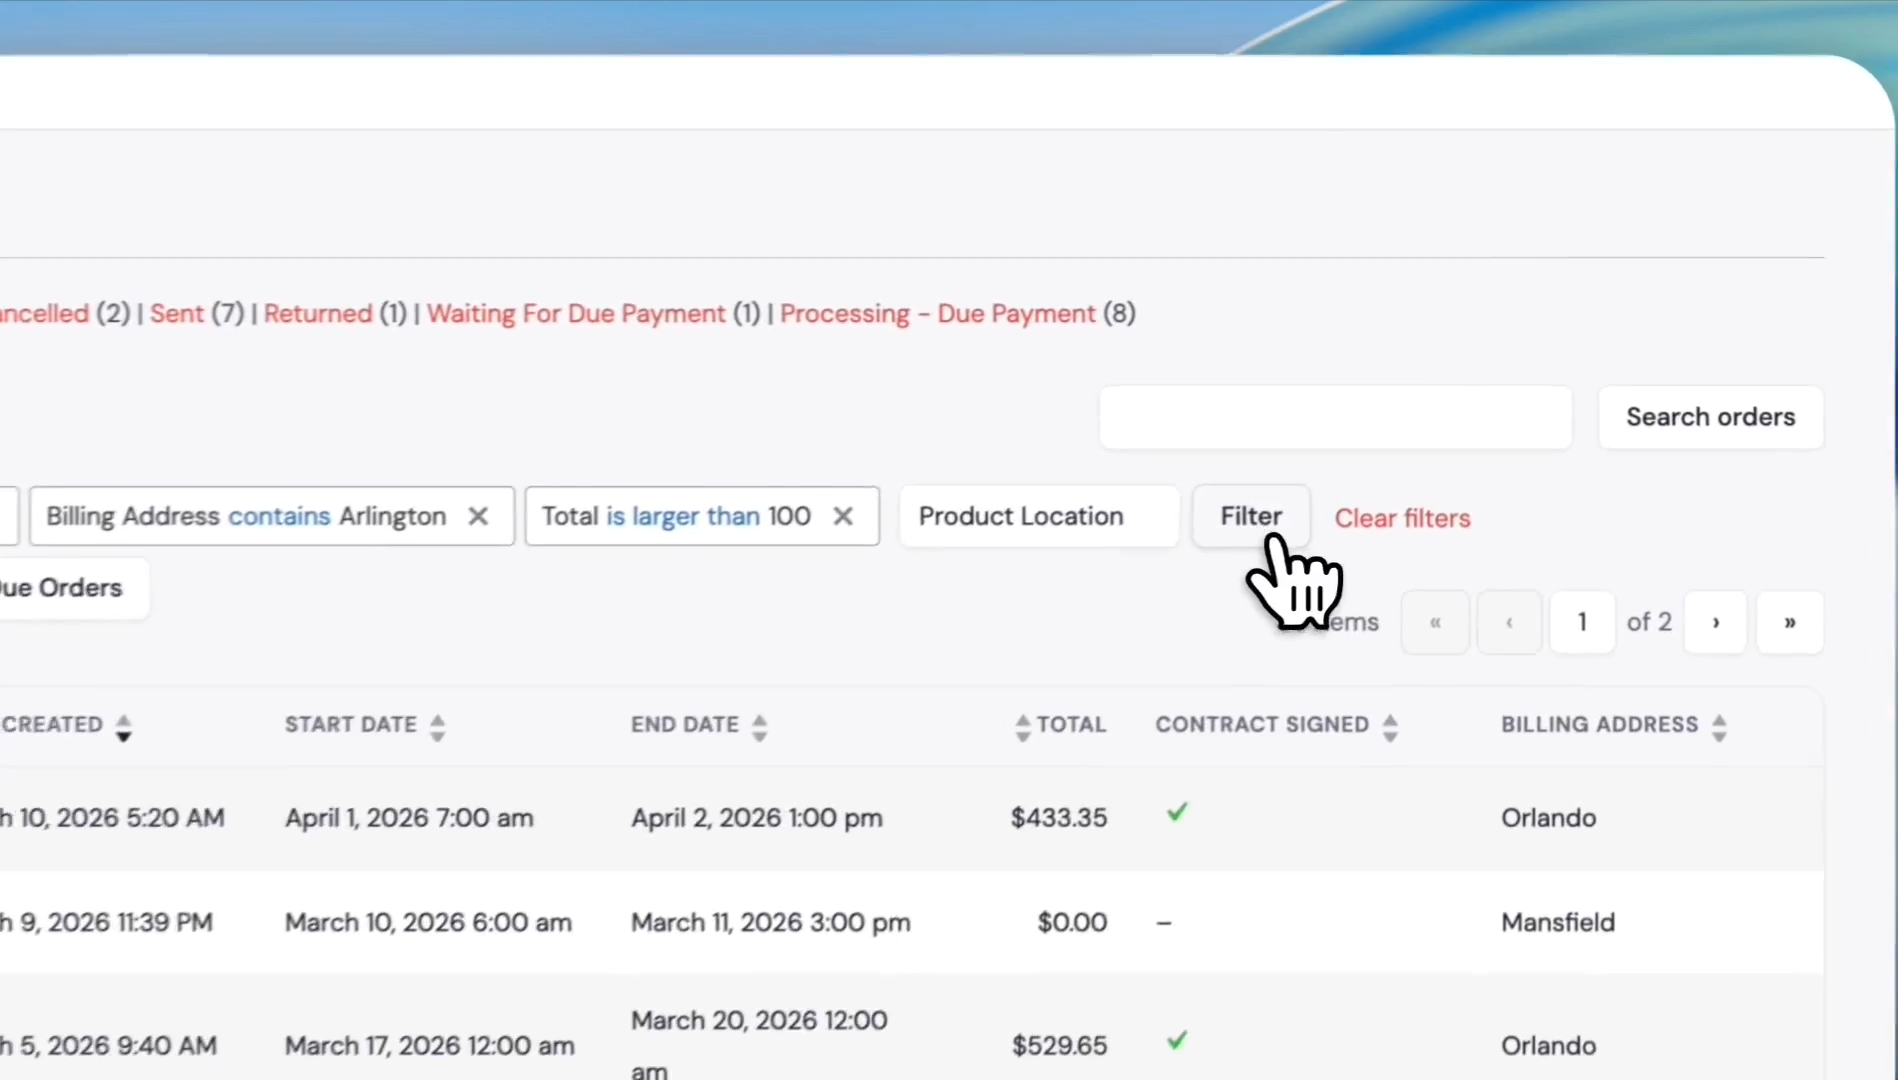
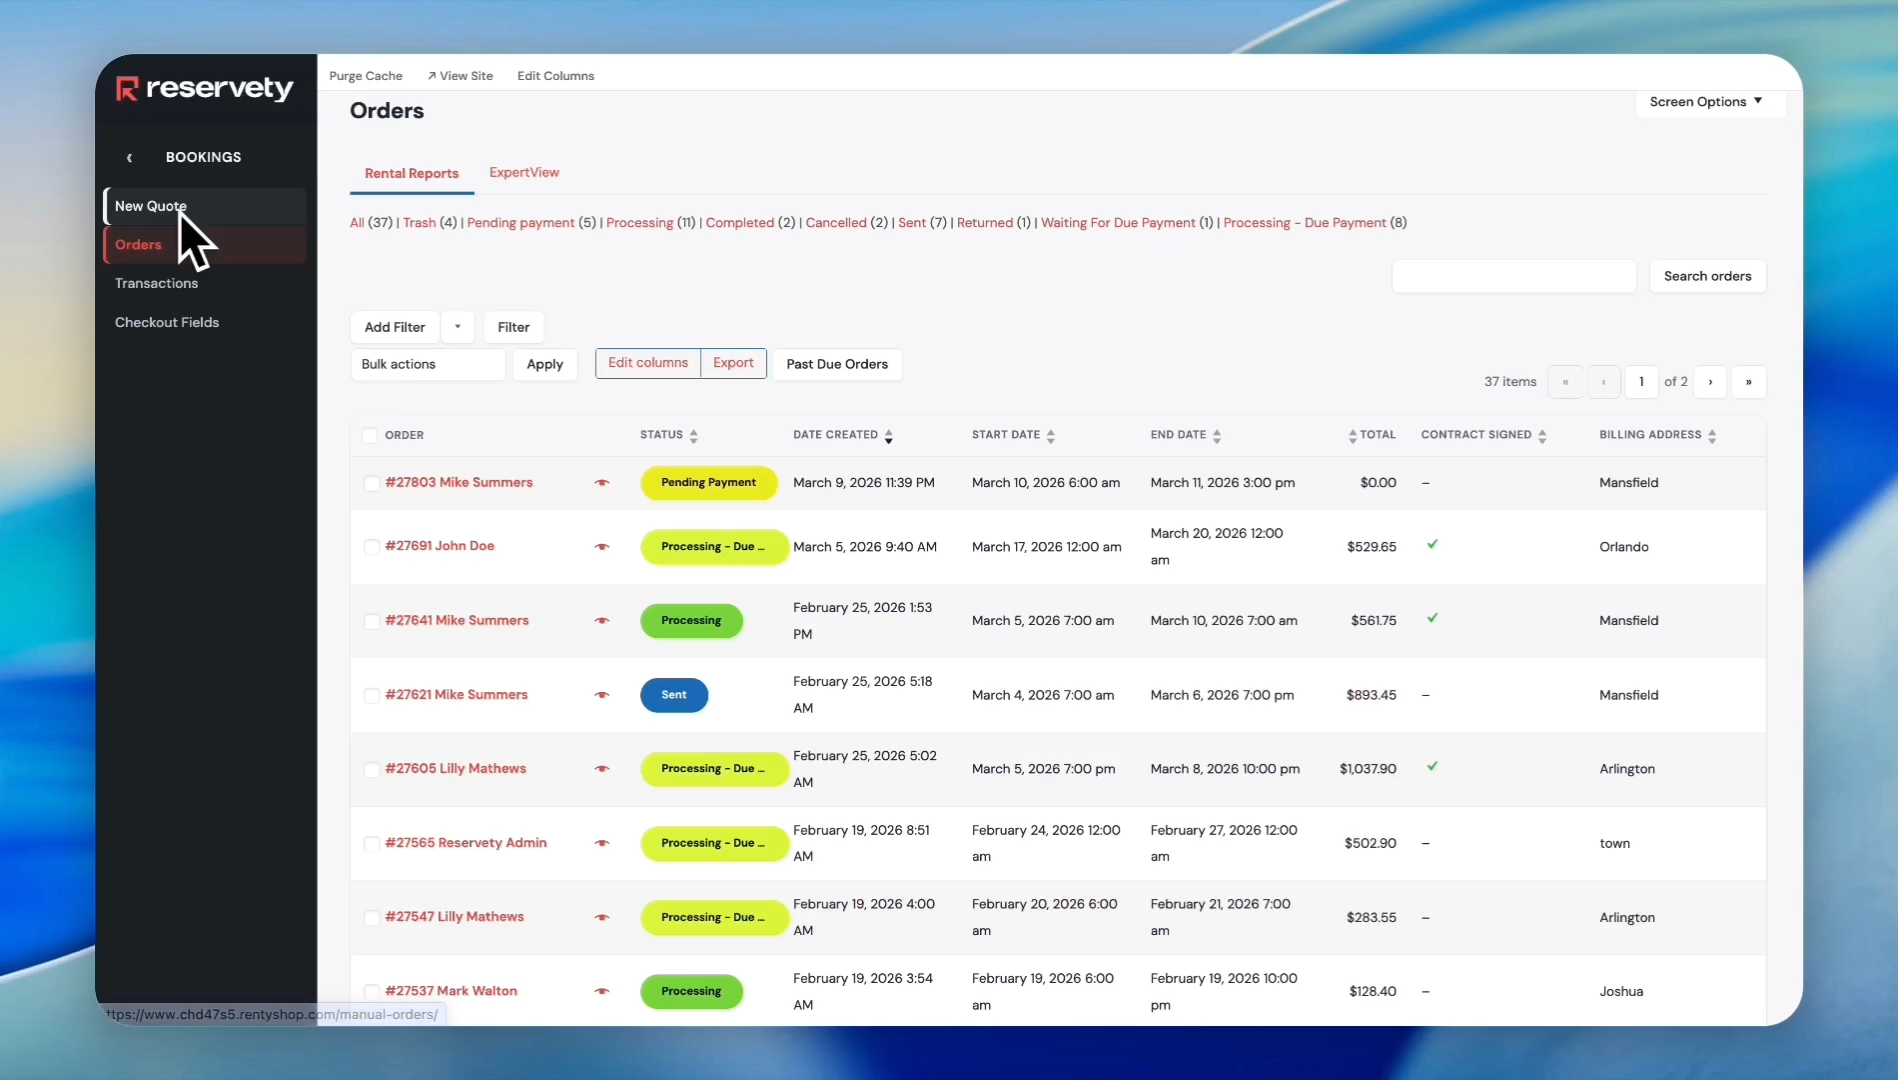
In this guide, you'll learn how to view, filter, sort, and export rental orders from your admin dashboard. Use status filters, date ranges, and custom criteria to find exactly the orders you need.

Video thumbnail
Watch the video walkthrough

Step-by-step guide

1
Click on Bookings in the left sidebar.
Step 1
2
Click on Orders.
Step 2
3
On the Orders page, you will see all your orders.
Step 3
4
Click the Export button.
Step 4
5
Click the Export button in the pop-up modal, then open the downloaded CSV file on your computer.
Step 5
6
Click on the Pending payment status filter. This status indicates that the system is still awaiting payment from the customer for the items.
Step 6
7
Click on the Processing status filter. It means the customer has already paid for the item or rental. Now, the business is processing its orders.
Step 7
8
Click on the Completed status filter. It means the order has been fully fulfilled. For example, the order was shipped, and the customer returned the item.
Step 8
9
Click on the Cancelled status filter. As you can see, there are two canceled orders.
Step 9
10
Click the Sent status filter to see orders that have been sent.
Step 10
11
Click on the Returned status filter to see returned orders.
Step 11
12
Click the Waiting For Due Payment status filter to see orders with past-due amounts.
Step 12
13
Click on the Processing - Due Payment status filter. It means the order has been received, but there is still an outstanding amount that customers need to pay to the business.
Step 13
14
Click the STATUS column header to sort orders by their status. When you click on the Status title, it groups all the statuses together. It organizes orders with similar statuses.
Step 14
15
Click the DATE CREATED column header to sort orders by their creation date.
Step 15
16
Click the TOTAL column header to sort orders by the total amount, starting from the lowest or from the highest.
Step 16
17
Click the Billing Address column header to organize orders by city.
Step 17
18
Click the Add Filter button.
Step 18
19
Select Date Created from the filter dropdown.
Step 19
20
Select "in month" from the dropdown.
Step 20
21
Click the calendar icon.
Step 21
22
Select February.
Step 22
23
Click the checkmark button to confirm the date selection.
Step 23
24
Click the Filter button.
Step 24
25
As you can see, the orders report for February is generated. You can export it by clicking the Export button.
Step 25
26
The file will be downloaded to your computer.
Step 26
27
Click the Add Filter button.
Step 27
28
Select Total from the dropdown.
Step 28
29
Suppose you want to view orders with spending over $500. Click on the condition dropdown.
Step 29
30
Select is larger than from the dropdown menu.
Step 30
31
Type 500 into the value field and click the checkmark button to confirm.
Step 31
32
Click the Filter button.
Step 32
33
This organizes the orders by total amount spent. These orders are over $500.
Step 33
34
Click the Add Filter button.
Step 34
35
Select Date Created from the dropdown menu.
Step 35
36
Click on the condition dropdown.
Step 36
37
Select between from the dropdown menu.
Step 37
38
Click the first calendar icon to select the start date.
Step 38
39
Select January 1st from the calendar.
Step 39
40
Click the second calendar icon to set the end date.
Step 40
41
Select March 31st from the calendar. That will be the first quarter.
Step 41
42
Click the blue checkmark button to confirm the date range.
Step 42
43
Click the Add Filter button again.
Step 43
44
Select Billing Address from the dropdown.
Step 44
45
Type Arlington into the input field. Click the blue checkmark button.
Step 45
46
Click the Add Filter button again to enter the third filter.
Step 46
47
Select Total from the dropdown menu.
Step 47
48
Click the dropdown menu next to the Total filter.
Step 48
49
Select is larger than from the dropdown list.
Step 49
50
Type 100 into the input field and click the blue checkmark button.
Step 50
51
We now have three filters to sort our orders. Click the Filter button.
Step 51
52
Our orders report for Arlington is ready. These are first-quarter orders over $100.
Step 52
53
The status labels can be changed based on your business model. For example, Sent could be Picked Up.
Step 53
54
Under Bookings, click New Quote.
Step 54
55
Click the Select Customer button.
Step 55
56
Enter new customer information or find the existing customer. In this case, we will use an existing customer. Click on the John Doe customer record.
Step 56
57
The system will automatically fill in all the information. Click the Back to cart button.
Step 57
58
Click the Order button for the product John wants. In this example, we used the 7x14 Dump Trailer.
Step 58
59
Set the "Booking Starts" and "Booking Ends" dates and times.
Step 59
60
Click the RESERVE NOW button.
Step 60
61
Click the SAVE button.
Step 61
62
Click the Order Actions button.
Step 62
63
In this example, we will pay for the user. In the dropdown menu, click Pay for User.
Step 63
64
Select the radio button for the desired payment method.
Step 64
65
Click the Terms & Conditions checkbox.
Step 65
66
Click the PAY FOR ORDER button.
Step 66
67
The order and payment have been received. The payment is received, and the order automatically changes to Processing.
Step 67
🛎️

Don't see what you need?

Remember, your plan includes Concierge Support. You don't need to learn technical settings. Just message us, and Ashish will configure it for you.

Chat with Support