Reservety
Getting Started 22 steps

How to Add Product Add-ons

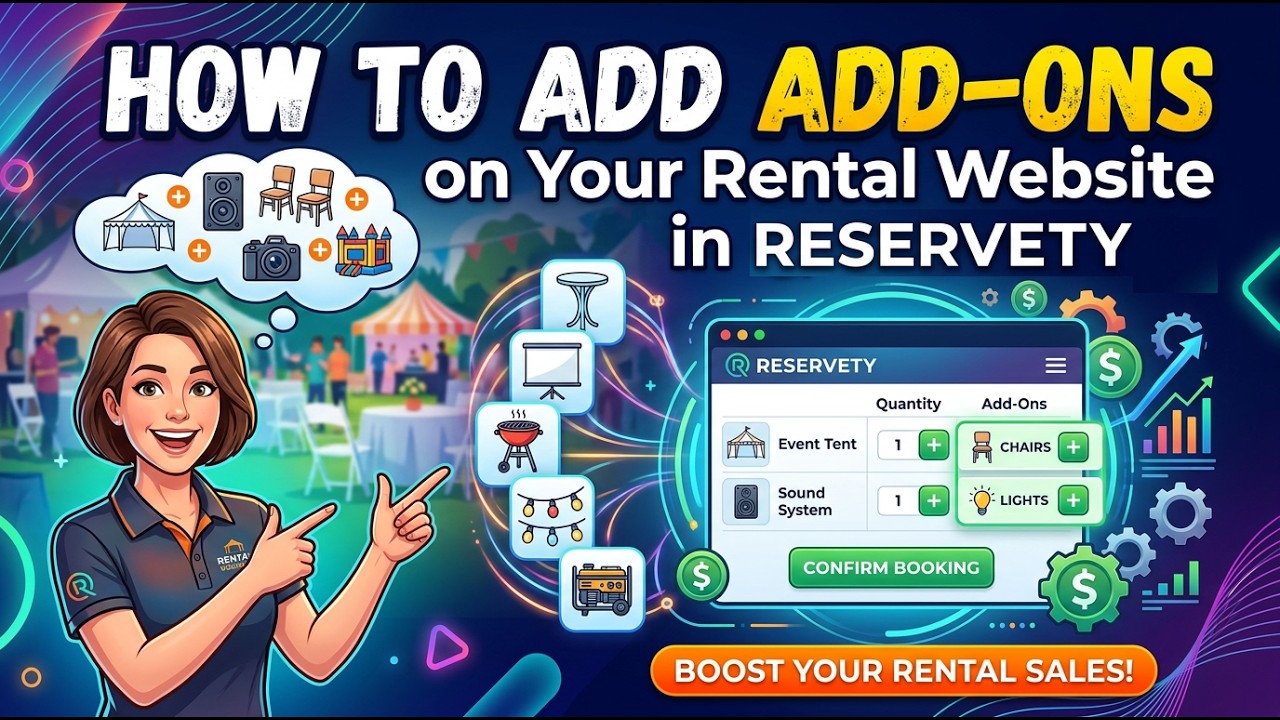
Learn how to create add-on options for your rental products in Reservety. This guide covers creating a global add-on form, configuring checkboxes with images and pricing, and assigning add-ons to specific products.

Video thumbnail
Watch the video walkthrough

Step-by-step guide

1
Log in to your Reservety dashboard and click on Products in the left sidebar.
Step 1
2
Click on Add-ons from the submenu.
Step 2
3
Click the Add Global Form button to create a new add-on form.
Step 3
4
Click the Add element button to add a new input type to your form.
Step 4
5
Select Checkboxes from the list of available element types.
Step 5
6
Click the Edit button on the checkbox element to configure it.
Step 6
7
Switch to the Label options tab to set up the add-on name and image.
Step 7
8
Click Add Media to upload an image for your add-on (e.g., a portable stove photo).
Step 8
9
Select the image from your media library.
Step 9
10
Click Insert into post to add the image to the add-on label.
Step 10
11
Adjust the image size as needed so it displays properly in the add-on option.
Step 11
12
Set the Divider type to Padding for clean spacing between add-on options.
Step 12
13
Switch to the General options tab to configure pricing and behavior settings.
Step 13
14
Enable the Required toggle if this add-on must be selected by customers.
Step 14
15
Configure the Text before price and Text after price fields to customize how pricing is displayed.
Step 15
16
Set the Hide price option and Quantity selector visibility as needed.
Step 16
17
Choose the pricing type from the dropdown (e.g., flat fee, quantity-based, or percentage).
Step 17
18
Enter the Price for the add-on in the price input field.
Step 18
19
Add a Description to explain what customers will receive with this add-on.
Step 19
20
Click Update to save your add-on form configuration.
Step 20
21
Use the Search for a product field to assign this add-on to a specific product, then click Publish.
Step 21
22
Visit your product page to verify the add-on appears correctly and customers can select it during booking.
Step 22
🛎️

Don't see what you need?

Remember, your plan includes Concierge Support. You don't need to learn technical settings. Just message us, and Ashish will configure it for you.

Chat with Support