Size charts Features allow you to create custom size charts for clothing and different items or equipment. You can create single or multiple size charts for products and place them in the description of the items in your inventory. Follow the tutorial below to work with size charts.
Creating Sizechart
1. Add New Size chart
Go to size charts on your dashboard and click add new to Add size chart button
2. Enter Size Chart Detail
Enter the title of the size chart, give it the same name as your product or item to be easily identifiable. And enter a description for your size chart
3. Create Size Chart Layout
Now Add rows and columns into your size chart.
Keep in mind: you need an additional row or column for labeling rows and columns.
To add/ remove columns click the +/- on the top To add/remove columns click the +/- icons on the right
4. Example (Optional Step)
To create a size chart with 3 rows and 3 columns, we click the 4 times + icon on the top and the 4 times + icon on right.
Since we need additional space to label, we created an additional row and column
5. Publish Size Chart
Finally click the publish button on top-left to save the size chart
6. Placing Size Chart
To place the size chart, there are two ways:
Place as short code Select on product page
7. Placing Size Chart From Dropdown
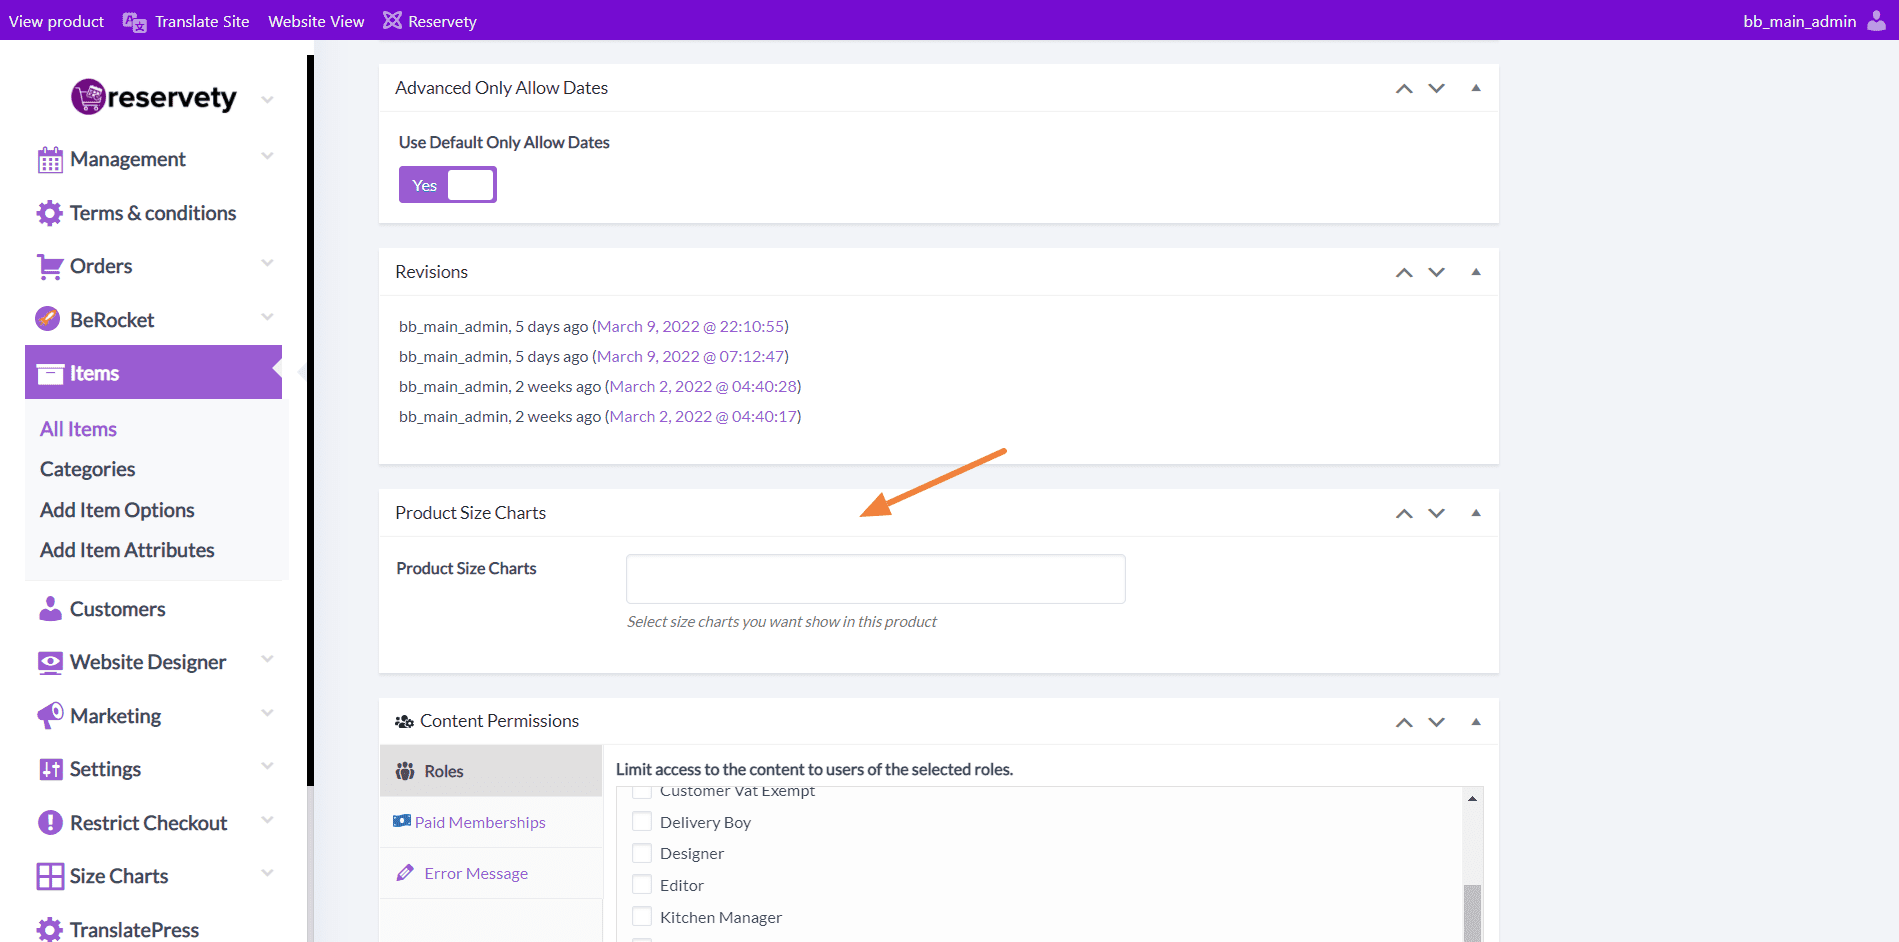
Edit the item where you want to place the size chart, Scroll down to find the field for the product size chart, Search specific chart for this item. And update the product.
8. Placing Size Chart as Short Code
The second way is to copy the shortcode below the update button. Visible in 5th step. And place it in the product description or short description, you can also past it into a block. And then place the block in a new product tab.